Friday, April 21, 2023

Saddle shoulder

For the last six months or so I was knitting projects with saddle shoulder sleeves. Saddle shoulder is a variation on raglan construction. The difference with raglan is that there are no even decreases along the armhole. The round top of the sleeve is a bit shorter than usual with a straight strip along the shoulder (like a saddle) to the neckline.

Why am I so fixated on this particular construction? The main reason - because it fits me really well. At least I like myself better in designs with saddle shoulders. 

This type of construction is traditionally used for men's clothes because men have (at least in general) broad shoulders and it accentuates them nicely. Maybe it's a faint reminder of military uniforms.  Since I started swimming regularly, my shoulders have grown about 2 sizes up. Lots of my tops and dresses don't fit me anymore, or are extremely tight in shoulders. But, I believe, the manly saddle shoulder sweaters and cardigans are now fitting me much better.

It is not easy to find a pattern with saddle shoulders. CORRECTION: it is not easy to find a good pattern with saddle shoulders where all the math is accurate and you have no problems fitting sleeves into the body. As I've mentioned already, it would usually be a pattern for men which are not easy to find on Ravelry, so I turned to my collection of old knitting magazines. In the old Phildars saddle shoulder patterns are modeled almost exclusively by men, but at least there are several of them, for different yarns and gauges. Sometimes, though, there is a feminine pattern with saddle shoulder construction (mostly for a cardigan). And that was my first choice.

I had bought linen yarn from the Midwinter Yarns in different colors, one of them being a rather bright pink. I love this store and their yarns for two reasons: yarns are good quality, and dyes are solid, colors don't bleed while washed. So I stacked up on their "summery" yarn (Lithuanian linen) hoping to make things for Florida. I used the mossy green first.
Loved the result but it was too big on me, and looked much better on my sister-in-law. Bummer! 

Then I used the cobalt one together with very thin Todd and Duncan cashmere. This one turned out exactly as imagined and I wore it all the time this winter.

Now it was the turn of the last linen yarn left - the bright pink. This Lithuanian linen is fingering weight, so I prefer to use it doubled. Plus I added one more thread of yarn - ColourMart Linen/ramie also in fingering weight - to "tame" the color a little bit, make it look not so bright. I had to use small size needles (2.25 mm/US 1) because otherwise the fabric was too porous and uneven.
I found a rare saddle shoulder pattern for a woman's cardigan in one of the old Phildars (see the picture above). My gauge was similar and I decided to use that pattern as a template (more details on the pattern page). I changed lots of things in this pattern - the main design, sleeve and body length, reverse stockinette instead of the regular one for the sleeves but I kept all the numbers for the increases and decreases, so the saddle shoulders sleeves would work with the front and back. And they did!
The sewing went smoothly and the end result is lovely and wearable (even in this unusual color). Actually, I liked the fit of this cardigan so much that it prompted me to look for other saddle shoulder patterns to try. And I soon found one in another old Phildar that I used for a stash busting project - a striped t-shirt.

I have mixed feelings about this one. On one hand it was fun to make and it looks cute on me. The construction proved to be immaculate as well. Again, sewing the parts together was not a problem (if you don't count the stripe matching - that was a real pain!).

The yarn is cheap and extremely soft, with no "body". It doesn't keep any shape or form. I was lucky to use this complicated construction since it provides at least some "bones", a carcass to the flowy, shapeless fabric. Yet, it is going to stretch with wear, I am sure. I should've made it shorter, giving it room for growing. Now, I will end up with a mini dress after several wears, which was not my goal:(((

In January I started planning my wardrobe for the upcoming trip to London and discovered that I left almost all my warm sweaters in Scotland. 

My solution was to make a couple of sweaters promptly. And I picked a saddle shoulder construction again, but this time for a seamless top down knit. I thought that it would be neat to compare and contrast two ways of making the same thing.

I chose Versal as my first top down pattern for one simple reason - I had a yarn (or rather two yarns combined) with the same gauge in stockinette. Only while working on this sweater did I discover how clever and simple the pattern is. Moreover, the designer treats us, knitters,  with the utmost respect and gives several finishing choices. At the same time, there are no excessive details, links to videos, explanations of knitting techniques. The pattern is compact and clear and I followed it without any changes. More details on my project page on Ravelry.

For the second top down seamless sweater I chose to reknit Navagio in a bigger size. First, because I liked the pattern when I was making it the first time. Second, because I wanted to experiment not only with the saddle shoulder but with volume as well and see if the change in size will change the overall fit.

Again, I almost didn't change anything in the pattern this time - knit all in the round without seams. Again, more details on the project page on Ravelry.

I wore both top down sweaters in London for two weeks and now can report the differences with saddle shoulder patterns that are bottom up and seamed.

There are definitely differences in fit. A top down sweater fits well in shoulders and doesn't need any adjustments when you stand or walk. As soon as you sit down, everything sort of crumbles and you have to make at least minor adjustments (in my case, fewer with Versal, more with Navagio II) to put the sweater back in place when you stand up. There are no such problems for the sweaters knit from the bottom up and seamed.

Top down sweaters are easier and faster to make. The downside - they are stretchy and lose their initial form and shape quickly. My Versal has grown by about 2 sizes already. Navagio II was really oversized to begin with so the growth was not that visible. Still, it was a big disappointment because I like Versal a lot and was planning on wearing it next fall. Maybe my husband can wear it now?..

Anyway, my next and so far my last project is a seamed sweater with a combination of raglan and saddle shoulder sleeves. Remember this cardigan, a ME+EM spin off?


I based it on a cardigan pattern from an old Phildar. Since I like the final fit a lot I decided to use the same pattern with modifications and make a plain simple sweater with high collar (high collars proved to be practical in colder climates) using some ColourMart cashmere in bright red that didn't need any adornments. Plus I've been on a "plain sweaters streak" lately.
My only problem with this sweater was that you cannot make fast progress on size 2.25 mm/US 1 needles. I took notes while working on it hoping to use them later if I like the result. I do like the result and you can find my notes on the project page on Ravelry. I will definitely return to this pattern, maybe with some modifications (I cannot make anything without modifications).

Now, what did I learn from all the experiments?

1. Top-down seamless sweaters with saddle shoulders are much faster to knit.

2. Top-down seamless sweaters with saddle shoulders don't keep their shape - they stretch with wear and they don't stay put when you sit down.

3. You can find all kinds of saddle shoulder patterns in the old Phildar magazines. They are well calculated and will be easy to put together if you get a matching gauge. By the way, there are more and more new saddle shoulder patterns on Ravelry. Sadly, almost all of them are top down seamless.

4. I love how saddle shoulder sweaters and cardigans fit me and am going to make more of them in the future. Probably, I'll stick with bottom up seamed constructions.

5. There is nothing bad in repeating the same pattern. On the contrary, it opens new possibilities for improvement and experiment (and modifications!!!). Plus familiarity with a pattern makes you feel comfortable and at ease.

6. Men's knitting patterns can be used for women - you just need to pick the right size, yarn, and needles. I already wrote about it here.

7. Do not be afraid of bottom up seamed saddle shoulder patterns. If they are good of course…


Sunday, February 5, 2023

Knitting stripes


Why do knitters like stripes?
That's easy - because it's fun to knit. Instead of falling asleep bored by the rows of endless stockinette stitches you just keep anticipating a color change. You tell yourself - OK, one more row and I start with red (light blue, green, etc.) yarn - and are going and going. It's really addictive.

There are other benefits of knitting striped garments. It is handy when you have small quantities of yarn of the same gauge. This is usually what comes to my mind when I take a look at my enormous stash. Striped knits are good for stash busting.

Unlike fair isle or intarsia, striped knitting doesn't require any special techniques and it can be done while talking or watching TV.

What else? I think the most important advantage is their versatility and wearability. It is easy to combine a garment that has several colors. At least for me with my predilection for dark (usually black) jeans and pants.

Everything else about striped knits is unpleasant to say the least. Sometimes it's really painful.

First and foremost, the innumerous ends that you will need to hide at the end of work. Because even if you knit in the round it won't be possible to keep each thread of yarn till the end without cutting.

Then there is the need to match all the stripes on the body and sleeves.
Again, it is easier to do while working in a round, but still you need to know how to avoid a jog - a little step that appears every time you change a color. The Internet is full of tutorials of how to achieve a "jogless jog" and it is not a mind blowingly difficult technique. 
Yet, if you are like me and prefer knitting with seams to insure that your final garment keeps its shape a bit longer (and adds some shape to your aging body), you will live through a nightmare every time while sewing the parts together. I for example can never get through a seam matching all the stripes the first time. I need two or three attempts to make it work.

This task becomes even more arduous when you sew in sleeves. I do like the end result for sure but going through this process is not my favorite pastime to say the least.
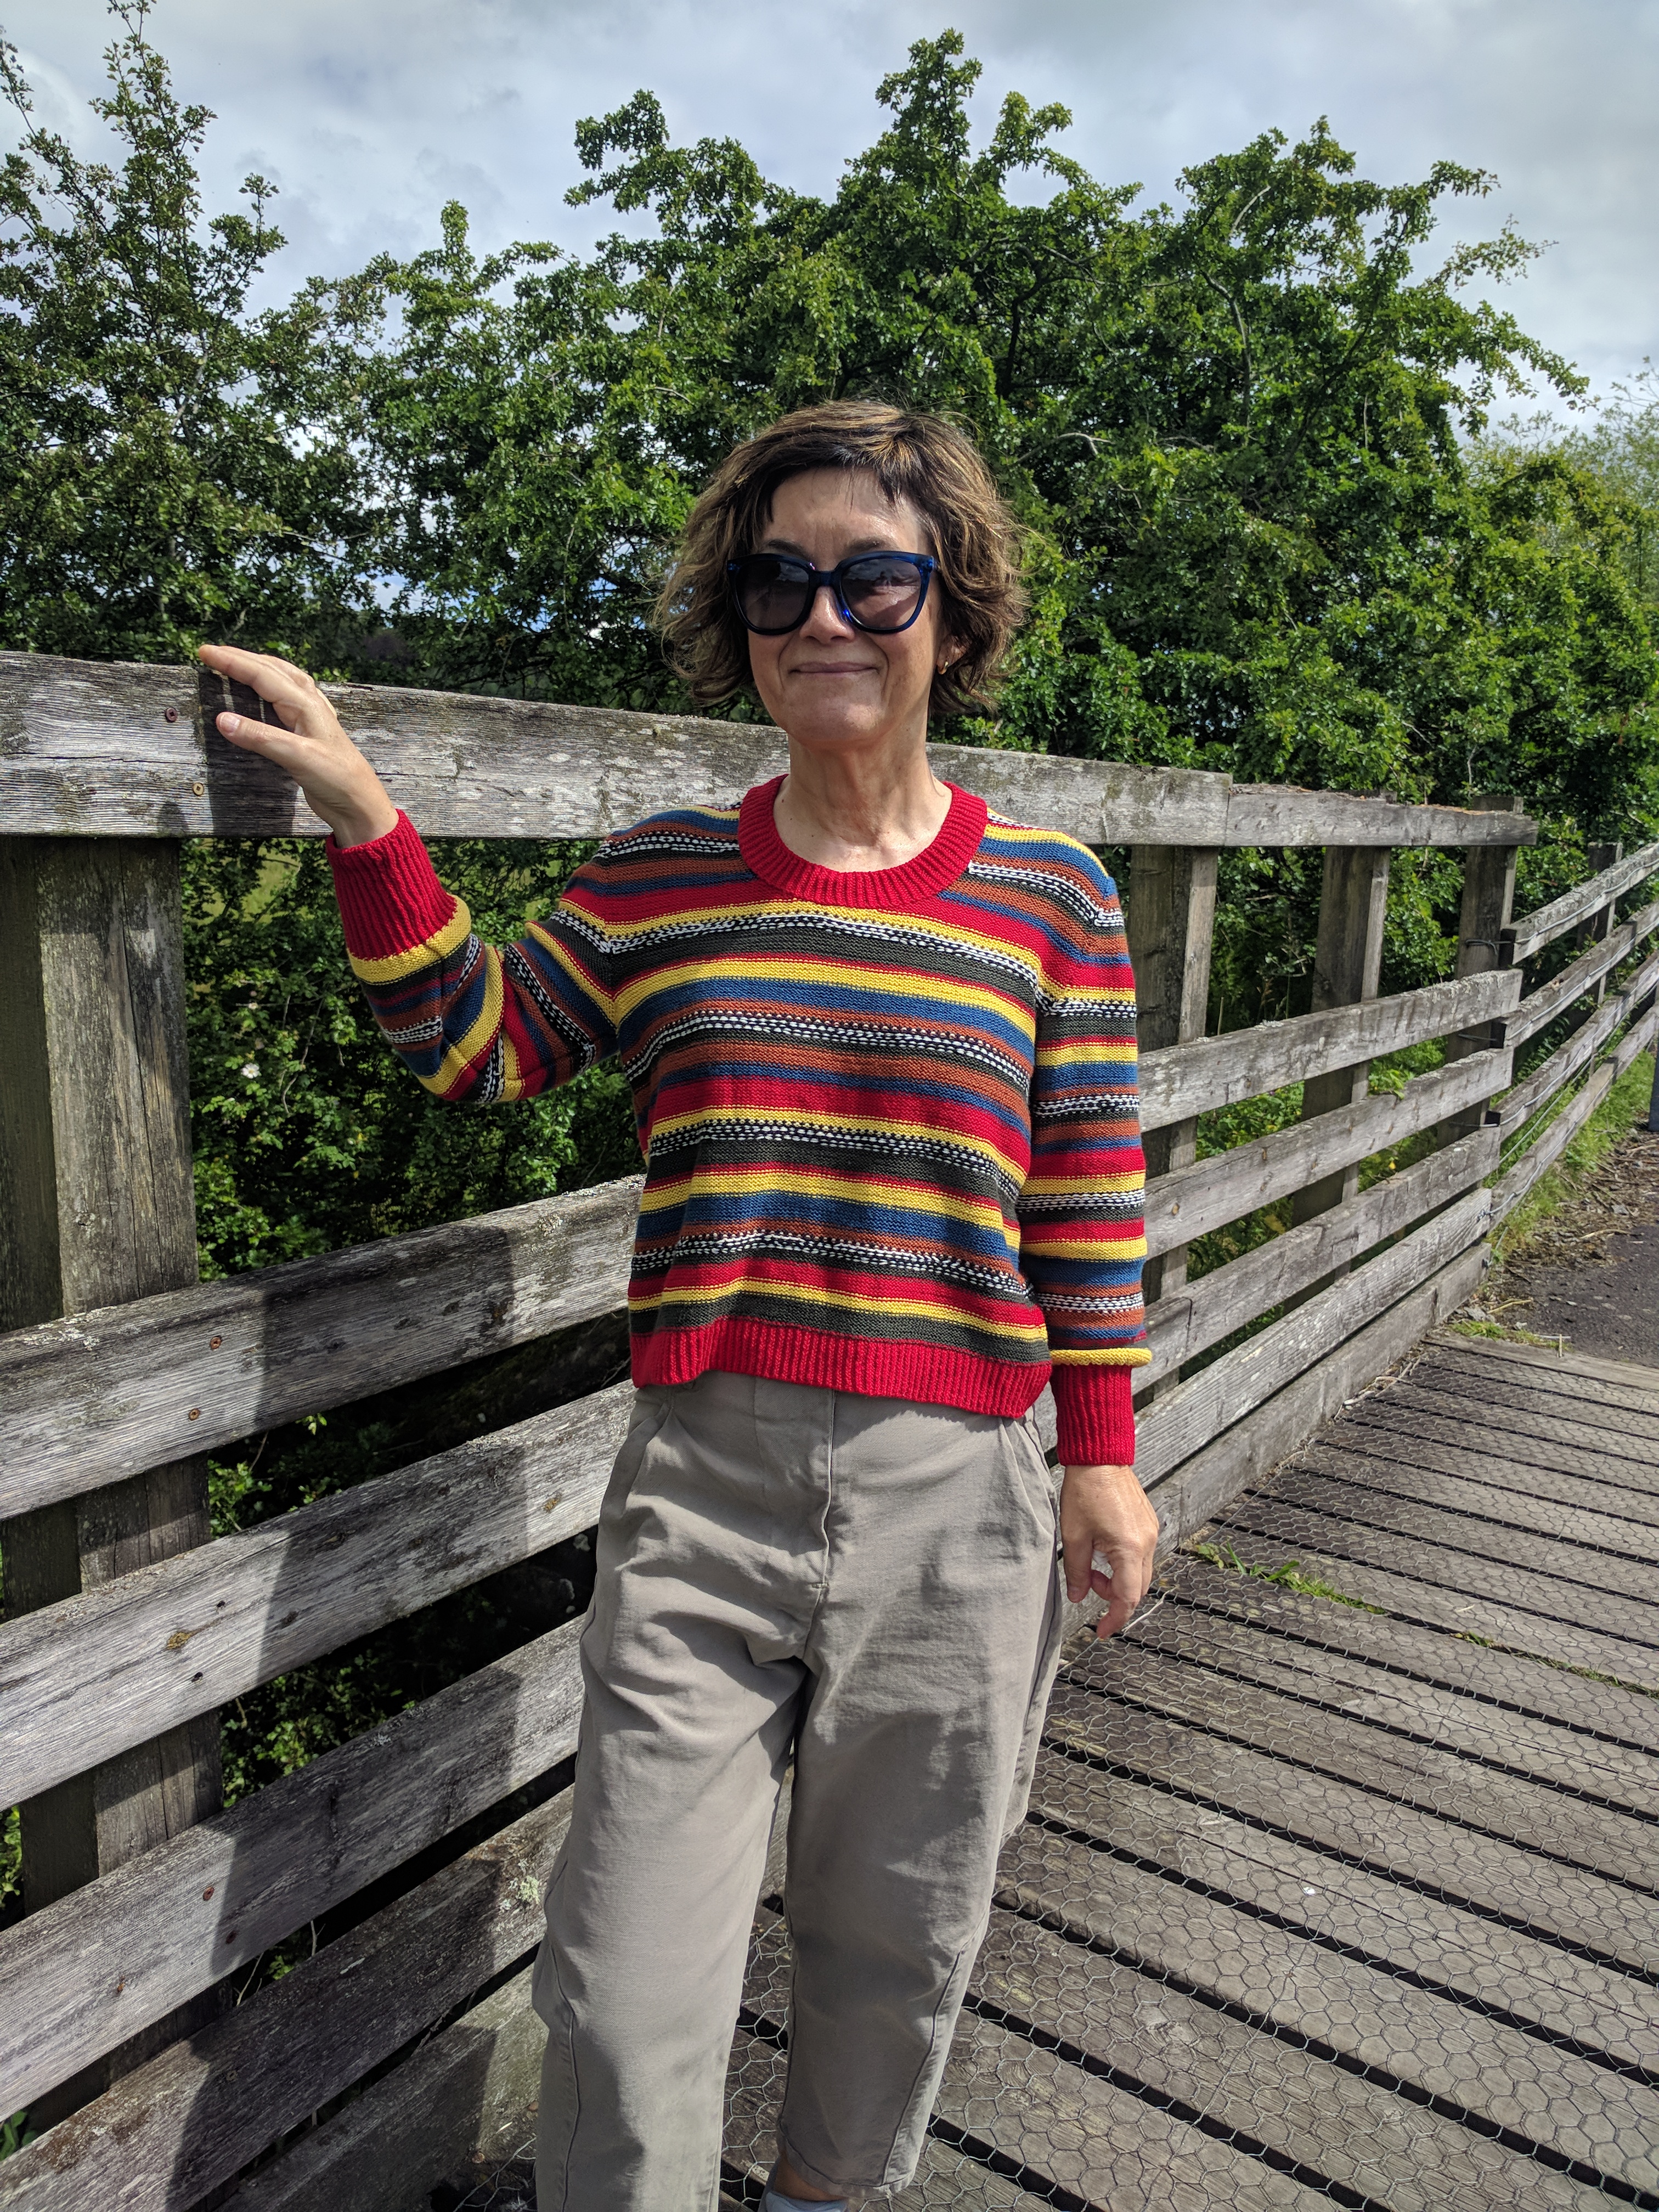
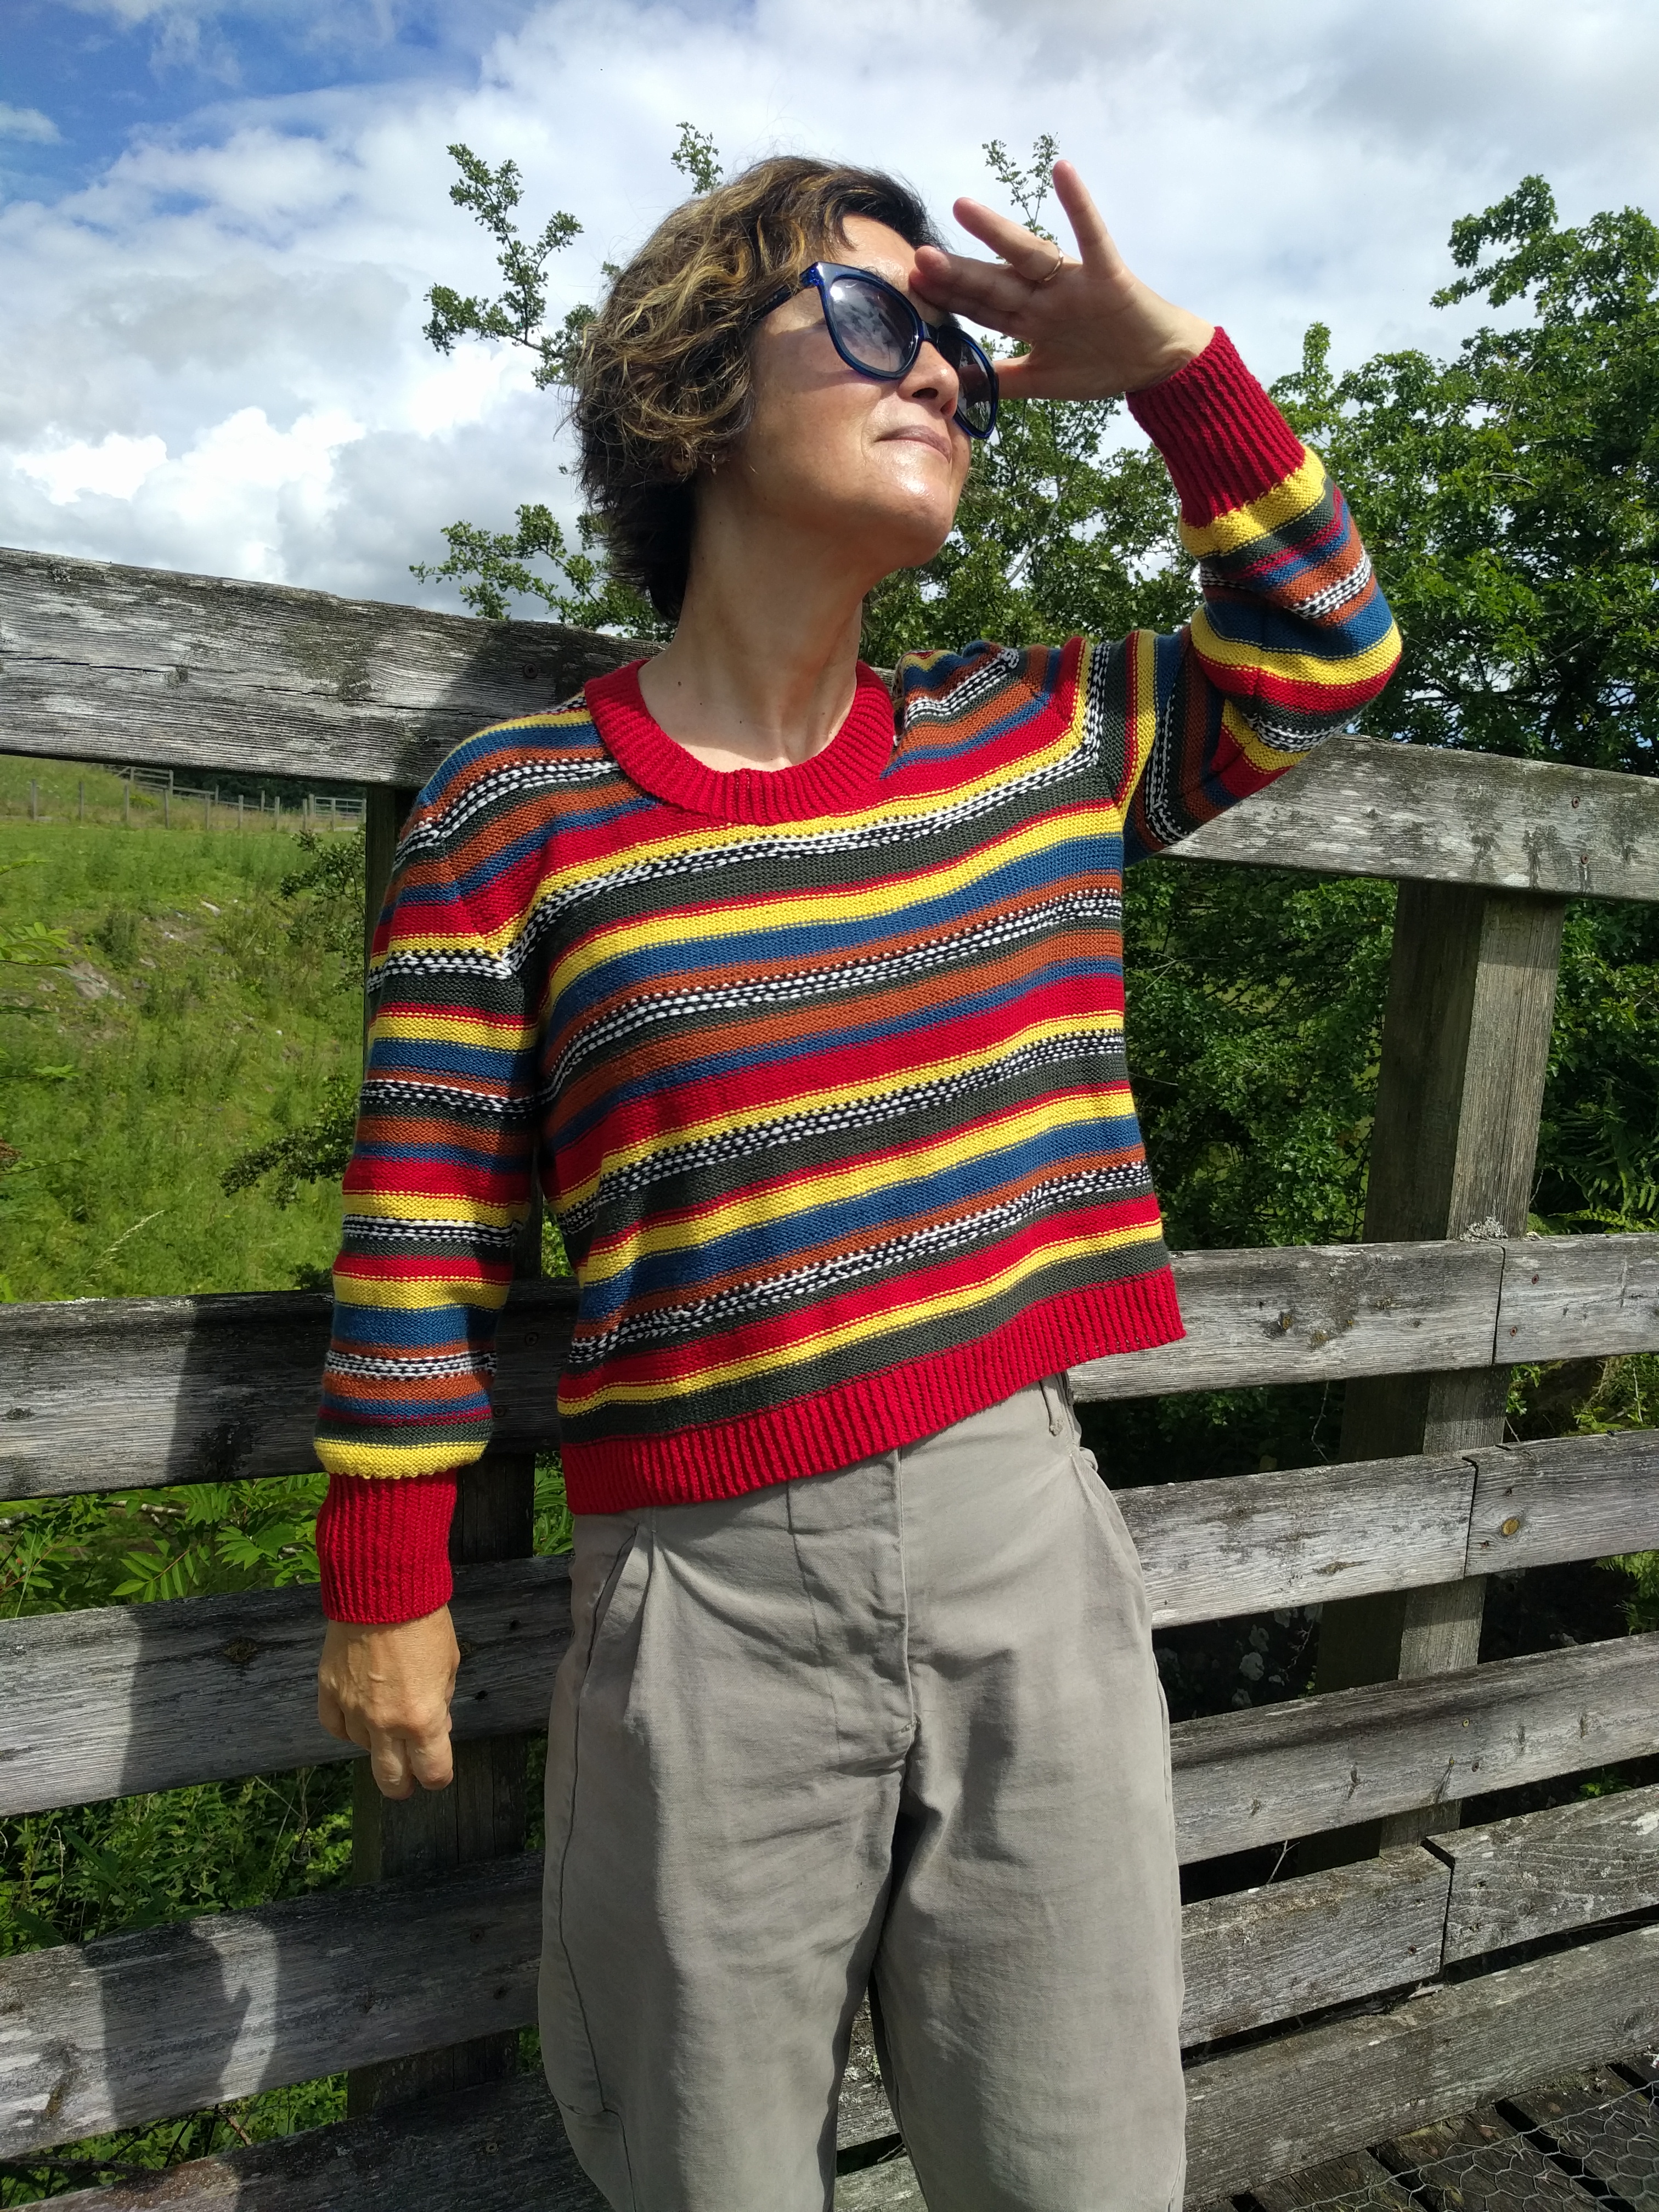
Last summer I made a striped cropped sweater from some odd balls of ColourMart's cashmere lace - some of them doubled, some tripled - in seven colors similar to the pattern that I found in an old Georges Picaud magazine.
Since I was dealing with cashmere - soft and weightless - I worked bottom up with seams to give it structure. I couldn't follow the pattern from Georges Picaud because I didn't have enough yarn. Hence, my pattern was totally improvised. I made the back 2 cm longer than the front like in my previous sweater (to accommodate for my body shape) and managed to sew them together in a way that it doesn't look weird. But then I encountered a huge problem - the ball of bottle green yarn was so tiny that it was obviously not enough for two long sleeves.
I came up with a solution to this problem - and I am very proud of my solution but as a result the finishing took me additional two weeks so if you decide to replicate my way of knitting, be prepared.

First, using a provisional cast on I picked up the amount of stitches for the largest part of a sleeve, right before the armhole decreases. Started with the last stripe before the decreases. Then did all the decreases for the sleeve's top. Then picked up the stitches on the bottom and went down the sleeve, decreasing stitches gradually. Finished with 1x1 ribbing in red and a tubular cast off. I had to follow the same color order as for the body only for the top sleeve and could improvise with the bottom part, changing the stripes order a bit, and using less bottle green (I ended up using the ball up completely).
And then came the seaming process. The purl side is the right one in this sweater and it turns out that sewing together two purled striped sides is much more difficult than two knitted striped sides. Needless to say that when all the stripes were matched, and everything was finished, I just couldn't make myself hide all the ends. There were too many of them and I was exhausted by this project. I don't care though, because nobody can see these ends but me. Otherwise this sweater is great - it fits me well and is perfect for Scottish capricious weather. Which is why I wore it quite a lot last summer and the ribbing became a bit stretched and wobbly. Keep it in mind - ribbing in cashmere stretches!
After this herculean task I managed to avoid stripes for a while. Till this January when I came across some cotton yarn in my stash that I totally forgot about. The yarn is called Peria. It is 50% bambu, 40% viscose, and 10% linen, 230 m/245 yds in a 50 g ball.
I don't remember when I bought it but I remember why I did it - it was extremely cheap plus I liked the colors. When I opened the parcel with the yarn, I discovered that it was too thin to use solo, and I didn't order enough for a whole garment if used doubled. Instead of ordering more of it, like normal people would do, I just hid it in a bin because it looked so thin, light, and soft, that I couldn't imagine ever making anything from it.

Fast-forward several years, I unearthed the yarn, rewound it doubled, made a gauge (still seemed too small), and hid it back again.

Now, as you probably remember, every new year my only resolution is to use up my knitting stash. In January I took out a couple of bags with summer-y yarns that in my opinion could be used for something wearable in Florida. And I promised myself that I won't be working on anything else till I finally use these yarns.
It was pretty obvious from the beginning that I had to make something with stripes if I wanted to use this Peria yarn. I didn't have equal quantities in different colors so it took me a while to come up with a stripe combination that would use more yarn in one color and less in another.
Since I made several rather big swatches I knew that this yarn doesn't keep any shape or form whatsoever. It needed structure. Lots and lots of structure. Just seams or even full-fashioned shoulders were not enough. Lately I became attracted to saddle shoulder construction. I made a cardigan using it and I loved the fit. The problem with it though - it is tricky and all calculations must be done really well for sleeves to fit with the body parts. Now multiply the difficulty level by two because it was supposed to be knit with stripes!!!
I found a pattern for a t-shirt with a saddle shoulder in an old Phildar magazine. My gauge was different, so I used the biggest size. My colors were different so I used different stripes. Added a few rows of ribbing at the bottom. Otherwise I mostly followed this pattern.
The process of knitting was a lot of fun. I think both sides of the fabric look equally well - the purl side even more than the knit side. Like in the original pattern I ended up using the knit side for sleeves and the purl side for the body.
The seaming was a nightmare. No, nightmare is too mild a word to describe what I went through. It was a pure torture.
I was sick with some kind of virus and spent three days on my sofa trying to put this thing together. The result is not perfect (look at this back - it is a bit crooked).
All the while I was asking myself the same question: why cannot I just go to a store and buy a t-shirt for 5-10-15 dollars, wear it, and then put it in a laundry basket, like normal people do? Why do I need to spend an insane amount of time on something rather flimsy and stretchy that would require hand washing and drying flat?

But I like this one. It is roomy and airy, right for our Floridian winter (and probably summer as well).
Unfortunately, I am left with quite a lot of leftovers that I cannot just throw away. So in near future I'll have to make something with them, combining with more remnants of my previous projects.
In conclusion:
Knitting stripes is fun but must be avoided if possible.😎😎😎

Monday, June 6, 2022

Experiments

After my long and fruitful romance with intarsia I moved to fair isle knitting. It wasn't difficult - they both involve working with many balls of different colors. 

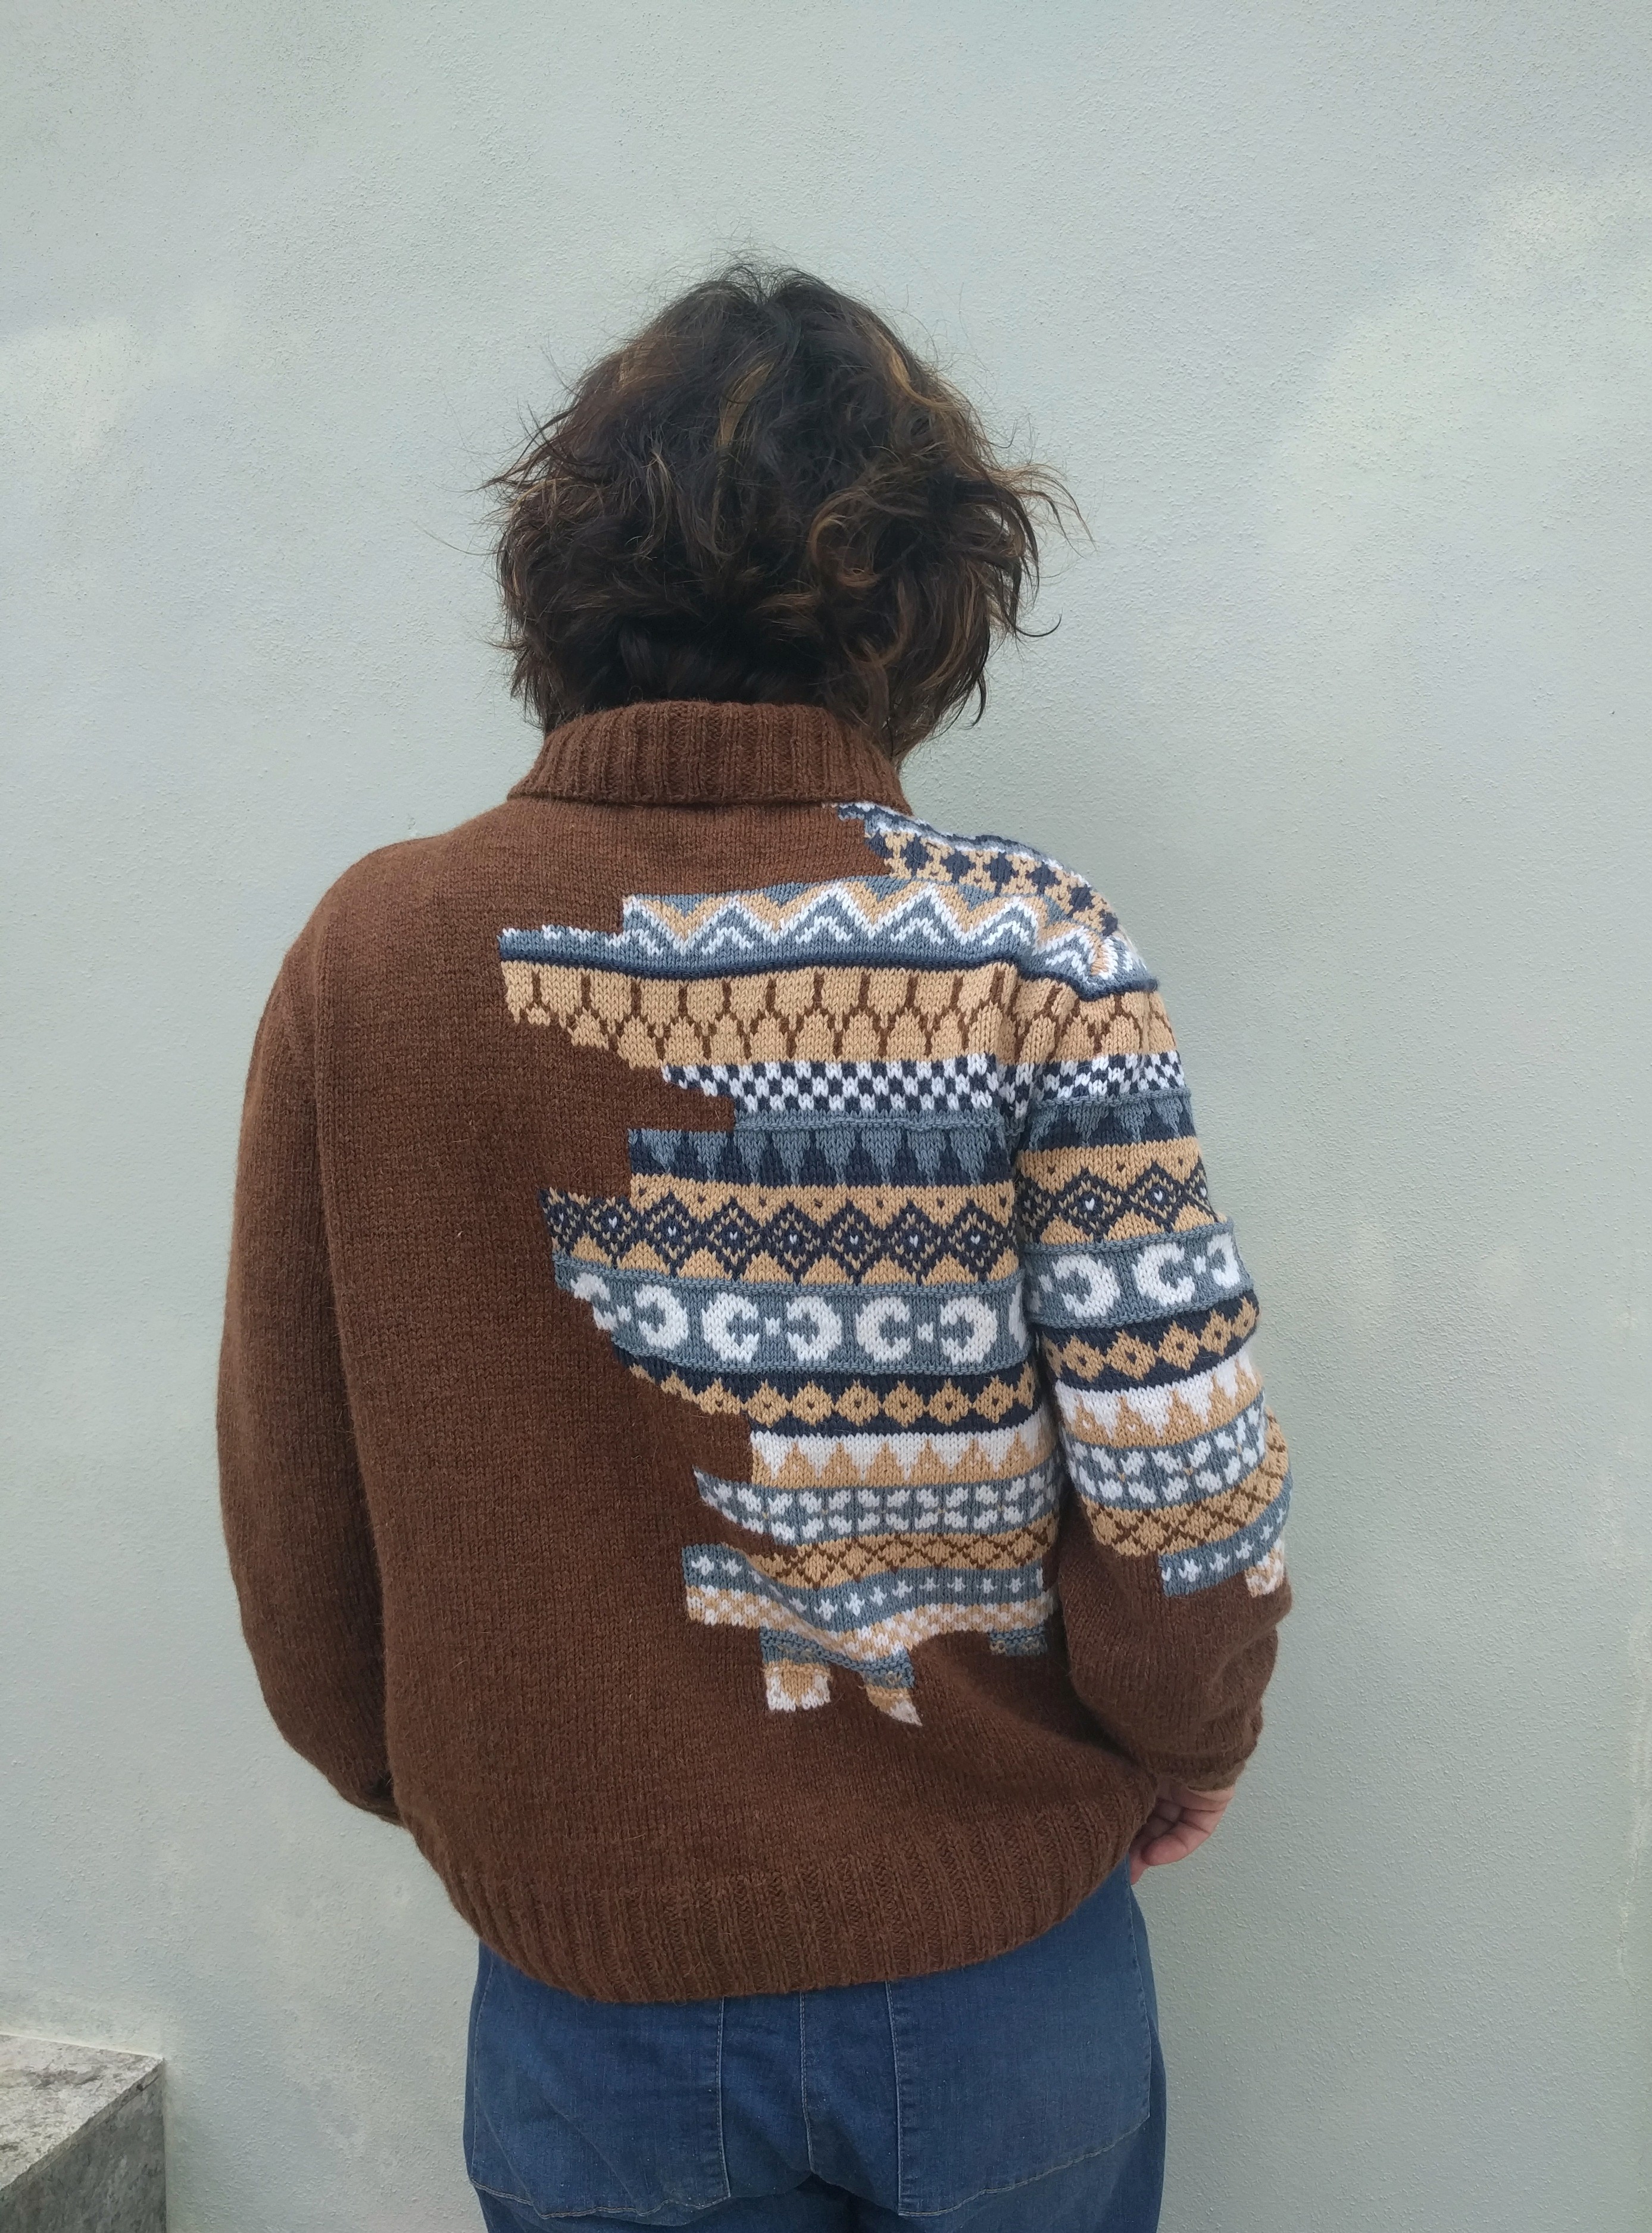
But first, I wanted to use intarsia and fair isle in one project (call it a "fusion" project:)))). I always wanted to try a sweater with one pattern that can be seen through another pattern, sort of "bleeding" through. There was a sweater in a Rag and Bone collection made in this technique but I don't buy sweaters, remember? Then I saw a similar pattern in an old Anny Blatt.

The fact that it was a man's sweater couldn't stop me. 

Do you start working on a project as soon as you figure out what you are going to make? You see something and you want it like yesterday, wondering why you've never felt this need before. You are itching to pick needles, some yarn, and start going. Sort of "new project" fever (is there a real name for this "disease"?). Does this sound familiar? I have it every time when I see something that I really truly like. And every time I have to make myself slow down and think about my choices. Why? Because I know from experience that when I dive into a new project right away without good ground work, I almost certainly fail. 

First of all, this new project of my choice must have a place in my wardrobe. I need to visualize how I am going to wear it and with what.

I also need time to compute and check everything, plus I have to pick a yarn that could be used for it. Sometimes this preparation process takes years like with this particular sweater. 

I wanted to replicate the fair isle/intarsia mix and I didn't mind the fair isle pattern itself. What I didn't like was the sweater's construction - too bulky in some areas, not well fitting, straight shoulders (beware of the patterns in which you cast off all shoulder stitches at once - these shoulders won't look good on you!). There were asymmetrical cables on the body and sleeves that I decided to ditch immediately (you cannot even see them in the picture, and I think that they would distract from the colorwork and make the final look too busy).

Instead of the Anny Blatt's design I decided to use a sweater pattern from Phildar New Classic again (after my success with this intarsia cardigan it became my trusty companion) because I wanted a certain fit: not too long or tight, and not too bulky either.

The main yarn - brown - is from ColourMart 4/14 NM dk wt angora/lambswool,  the rest - all kinds of yarns from my stash. They are all different but they have the same gauge, and work well together. If someone tells you that you cannot use different kinds of yarn in one project - let them look at this sweater (and this cardigan, and this also).

The actual knitting went faster than I hoped for. Since my gauge was different, I had different number of stitches on my needles and I couldn't possibly faithfully follow the colorwork pattern so I had to improvise, then improvise more, and keep improvising till the end.

A little explaining footnote.

It might look like I am a big fan of improvisations in knitting because I describe it quite often when I talk about the process. I have to set the record straight - I don't like when I have to do it. I always have a very detailed plan before I start making something and I prefer to stick to this plan. Why would you need a plan otherwise? And this is the reason for a long delay before the idea of a garment and its execution - I need to create a good action plan. I don't knit for the process (well, process is important but it is not the best part), I knit for the result and I want to get what I want at the end, not whatever happens to appear from my needles. 

So to make my improvisations more "regular", to organize and put some order in them, I made a magnified copy of the fair isle part which allowed me to make changes right on the grid. Plus I had to reverse the whole thing for the back to have a mirroring effect (you cannot do it mentally - the design is too complicated, you need an actual picture for a referral).


 As for the sleeve (there is a colorwork pattern on one sleeve only), I had to proceed at my own risk - my numbers were totally different, so I just used the same fair isle stripes in varied lengths as on the body.

Working with ColourMart yarn was a pleasure (it almost always is which is why I keep buying yarn from this store). All pieces became soft and a bit fuzzy after washing and blocking . And then I put them all together and discovered my two big mistakes.

First - the neck opening was too tight for my head (!!!!). I could squeeze it through without glasses, but I couldn't have anything around the existing not very big neckhole so the originally planned ribbing was not happening.

My second mistake was that I forgot to make the back longer than the front. I am getting more and more stooped with years and the back of my sweater would always hike up and stick out and I would need to constantly check and rearrange it unless something clever is done with the sweater's construction. This sweater is not long enough to compensate for the lack of length difference between back and front. And It is not tight enough to hug my body. I was so into the intarsia/fair isle combination, that I simply forgot to add some rows at the beginning of the back stockinette, and compensate for the difference by short rows at the front.

Anyway, the first problem had a solution. Instead of a ribbed neckband I made a ribbed collar. Somehow it improved the outlook proportion-wise. I think that even if I made a normal size neck hole, with a collar this sweater looks better, more balanced.

As for the second problem, nothing could be done. It is what it is and I have to live with it. 

If you are wondering how to get the pattern on a sleeve to match the ones on the body, that's simple. You need to start the armhole decreases for a sleeve at the same time as for the body. Which is why you need to make the body first and then carefully measure the length of your future sleeve to the armhole. This way you can calculate where to start the sleeve colorwork so the decreases for the sleeve's top will be at the same row that the decreases for the armholes.


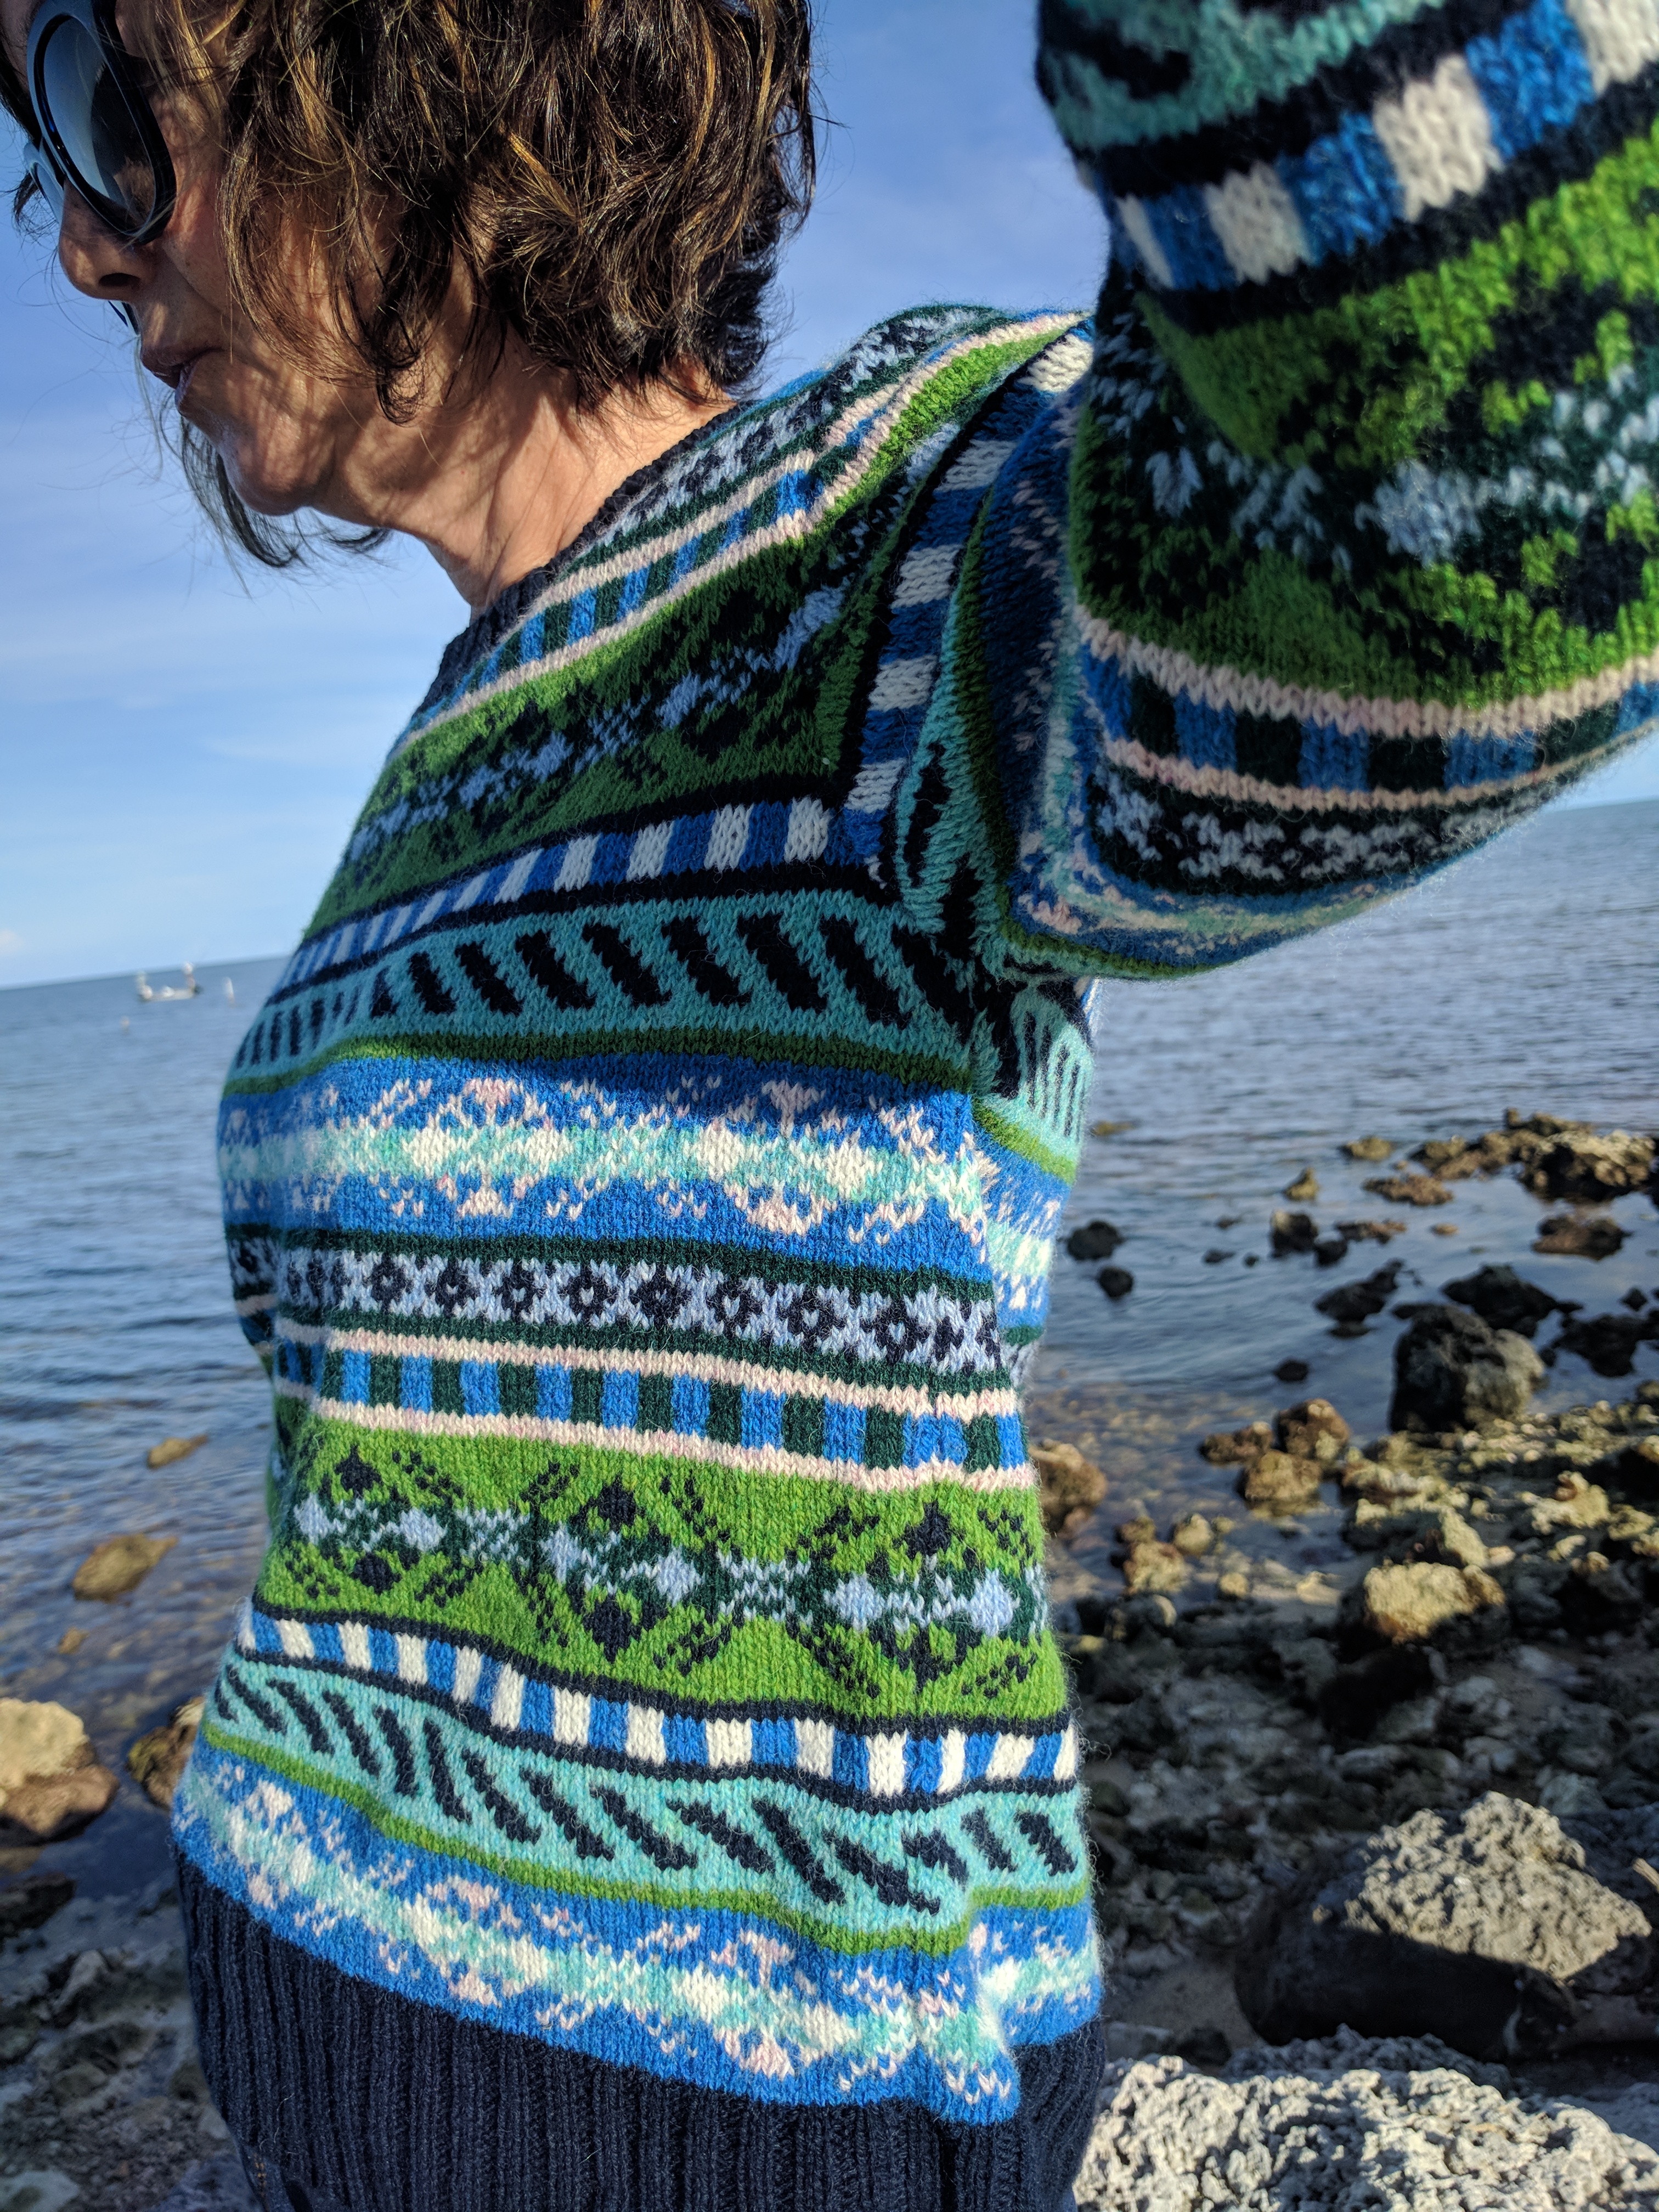
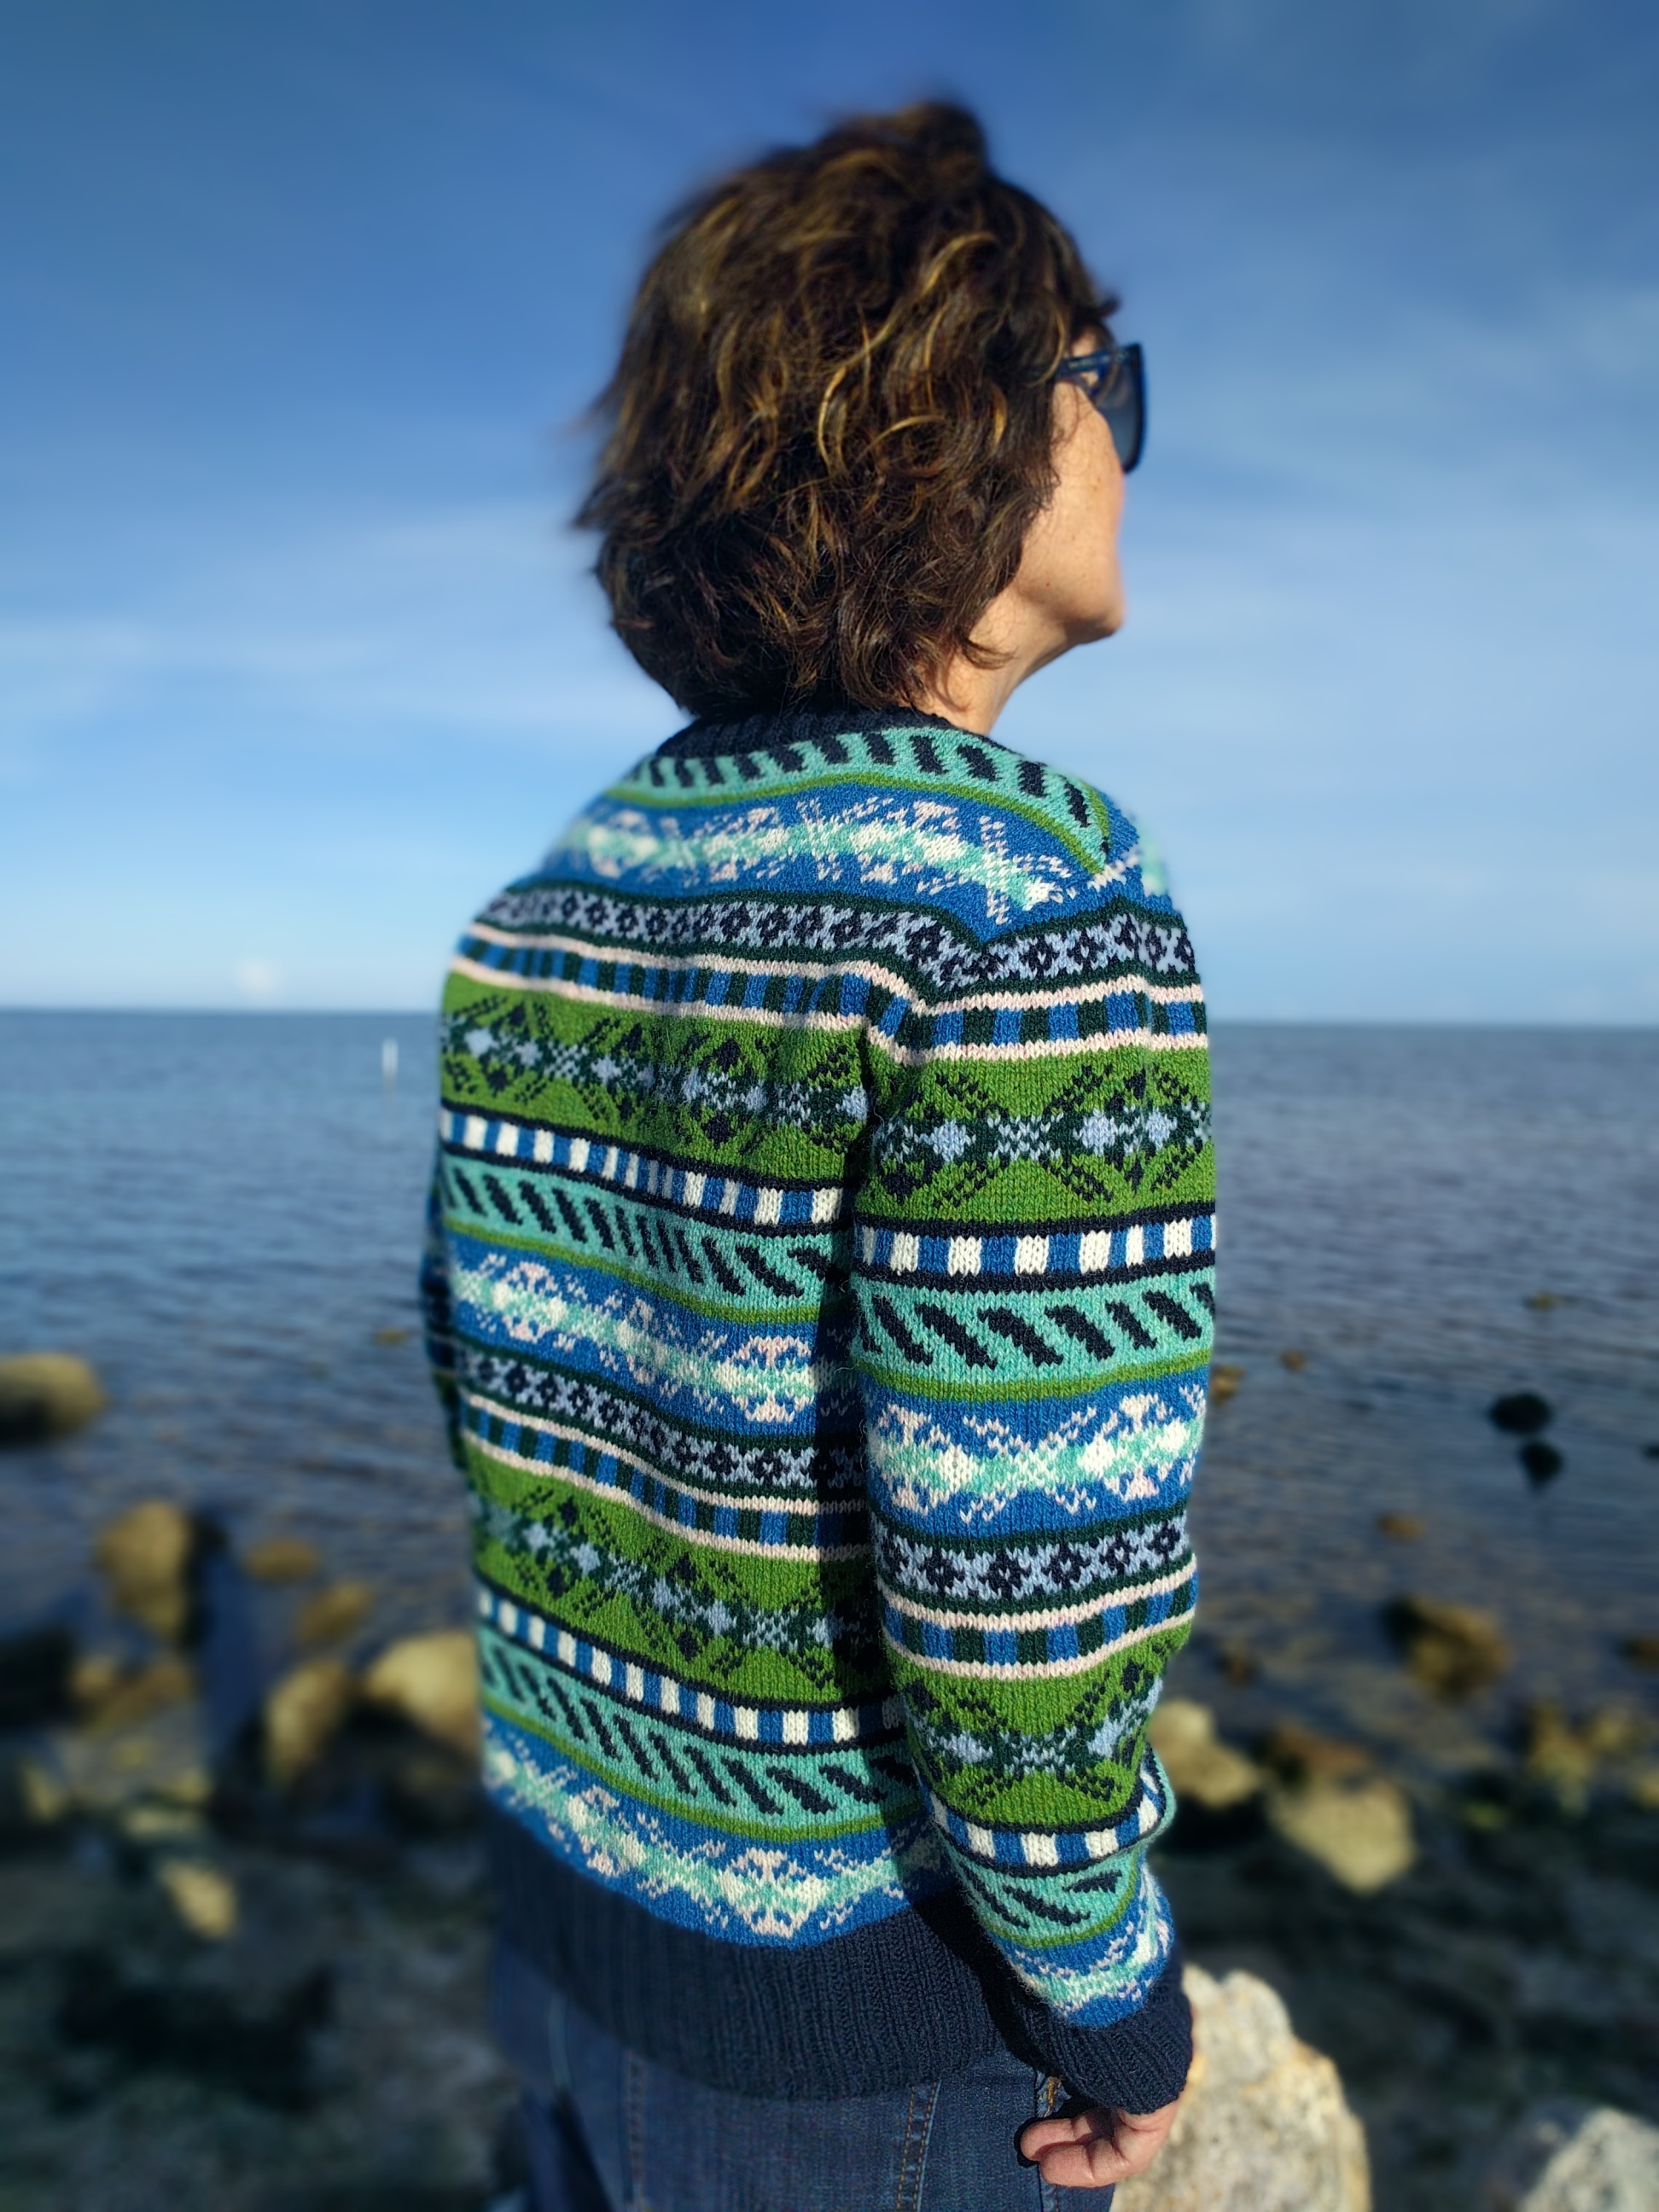
My next project was supposed to be an all fair isle sweater. I saw it many years ago in Phildar magazine and was dreaming about making it one day for myself. Last year in Scotland I finally bought all these beautifully colored yarns from Clare @wee-county-yarns

One more footnote, about the yarn

This Scottish yarn - JC Rennie Supersoft Lambswool - is a marvel. It is very thin, so the garment is light, not heavy but still warm. It is very sticky so if you are a fan of steeking - it will work wonderfully for you. After washing and blocking it fluffs up a bit, becomes smooth and even. Lovely yarn, I will buy it again!

I am not a steeking fan though (because of the final fit as I've already explained several times), so my sweater was made in pieces. But this time, since so much work was going to be involved into making it, I wanted to be sure that the final fit would be exactly as I wanted it to be.

I started looking for different possibilities of making the back longer while knitting the whole sweater in fair isle technique. The problem is that you cannot just knit the back longer than the front. The colorful stripes on back and front have to match when you seam the sweater together.

One possibility is to make the ribbing longer at the back and then leave the back and front ribbing unsewn, as a slit or vent. That couldn't work in this particular case - my yarn was fingering weight, I was using US 0 and 1 needles, so the ribbing would have looked flimsy and sloppy.

Instead I decided to make the pattern myself to fit my body. Yes, apparently I've got too much time on my hands. I never wanted to even touch pattern making - too many numbers, too complicated for my taste. Plus my brain is weirdly unresponsive and just shuts down when I try to imagine something three dimensional. Brr, total disaster!

You wouldn't believe how many hours I spent watching YouTube videos, reading books (yes, in plural) and websites, searching the Internet. I drew and cut several patterns from paper (like a pro would!), cut them from fabric (!!!), basted,  and then tried on. I used my favorite t-shirts to figure out the best measurements. I didn't start till I knew what I was doing… but actually, I didn't. I wasn't sure that all these drawings and calculations would work and was really nervous about the end result. Probably, this is the reason for finishing it faster than normal for a fair isle sweater from a fingering yarn made with US 0 and 1 needles.


Have you felt this feverish rush to finish a knitting project and finally try it on (pretty much like the one at the beginning of a project, but stronger)? I feel it every time. And again, every time I tell myself not to be in a hurry, and take my time with finishing touches. Because they can make or break your work. Isn't it strange that our instinct makes us sprint at the very beginning and at the end, at times when you have to keep your calm and 1) do all calculations needed; or 2) do all the finishing needed.

Yesterday I put on my fair isle sweater (I call it Enchanted forest) for the first time. And was happy to see that my efforts were not in vain. I got exactly what I wanted.


My shoulders decreases are 2 cm higher for the back which adds length to it, makes the back stay in place, and it isn't particularly noticeable if you don't scrutinize my shoulders. The neck opening is big enough for my big head.

I am particularly pleased with the armholes shapes and the sleeves. They are roomy enough, not too tight but not too big and shapeless either. I know that the most fashionable sweaters nowadays must have long, big sleeves. But I am planning to wear this sweater under a coat or jacket, and big sleeves would scrunch up and crash under another garment, making me uncomfortable and unable to use my hands (I use my hands all the time!).

And this is the story of the bluish-green fair isle sweater. Now I have a lot of leftover yarn in all these bright beautiful colors. I might make a vest, or a hat, or a scarf with it, who knows?

But first I need to make something very simple, without intarsia or fair isle, just monotonous stockinette. And I need to tweak my (!!!) sweater pattern, so next time I won't be a nervous wreck but a self-confident knitter.


Thursday, April 21, 2022

Intarsia obsession

How does a knitter get obsessed with intarsia?

It doesn't happen overnight for sure. 

I was never a fan of intarsia for several reasons. First and foremost - the need to cut yarns and work from many small balls. It creates lots of leftovers and complicates your work. Working from one ball is by far cleaner and easier. Second reason - places where colors are changed are prone to have gaps or holes, which is true especially when you begin connecting different yarns. And - as soon as you start seeing a finish line - you get stuck with innumerable tails to hide! 

All this said, a couple of years ago I made a cardigan from Keito Dama, with some elements of intarsia.

It turned out to be not too difficult to use different balls at the same time. And the process was rather engrossing and fun. It was akin making a tapestry only with needles. The bonus part - I love the end result!

My next intarsia project - also a cardigan, also from Keito Dama - was a total revelation for me. Not only did I figure out how to avoid gaps and holes between different yarns easily (just hold them tight at the connecting point) but I wasn't much annoyed by the constant untangling of balls in use. There was some method in the madness and after a while I could identify the ball that was "the main culprit" and get rid of the mess quickly. And the fact that my colorblock cardigan was worn quite a lot last summer made my affection for intarsia grow.

I've already told you many times about my love of old knitting magazines. Of course, there is some nostalgia involved but the main reasons are accuracy of their math (especially true for the old Phildars and Pingouins), clarity of their drawings and diagrams, and unlimited choices and variations of patterns that could be incredibly inspiring.

In my vast collection there are several Anny Blatt and Filatura di Crosa magazines from the 80s full of colorful intarsia projects. I don't think that they all look modern now. Moreover, most of them definitely don't match my style and I wouldn't wear them in a million years. Especially the ones from Anny Blatt - too complicated, with too many adornments and details that distract attention from the whole garment and make it look too busy. Yet, I love looking at these magazines for inspiration. They are so full of clever ideas!

Meanwhile, life was going on, and I became busy knitting for my nearest and dearest. All of a sudden I started getting requests from everyone. It is nice to feel needed and useful but it is boring and not exciting to make the same things again and again. As a general rule people like things that they already know, right? Especially in clothes, as I discovered recently. Last year my older daughter took me to a store and showed me a sweater (made from some very expensive cashmere, but oh so bland and simple) that I had to recreate for her. Done (no pictures, sorry).

My husband asked for another zippered jacket with nothing - no hood, no pockets, just a zipper. Done (also no pictures).

My other daughter didn't want anything but she liked my sweater with a zipper and tried  the one that I made for Halloween/Christmas.

It fits her like a glove - the sweater went to New York.

My half-brother (I have two half-brothers) asked me for a sweater and I spent a long time making it (he is tall with long arms).


It wasn't easy because he lives far from us, in a different country, on another continent. He gave me his measurements but still it was nerve wracking and I was anxious and stressed till the moment he put the sweater on and sent me pictures.
So this one was done as well.

In between I managed to make a little jacket for myself in simple stockinette. I made it almost entirely while watching TV (there is always lots of TV watching around Christmas and New Year).  I saw a colorblocked jacket on ME+EM website that I liked a lot plus I had similar colors (not exactly, but close enough) in my stash.

I changed the construction of the jacket  - mine has raglan sleeves. Otherwise, I tried to stay as close to the original as possible.
This is the original version from ME+EM website
I love this jacket - it is light, soft, warm, and can be worn under a coat. The bright sleeves are my favorite. This color makes me happy. I don't have good pictures because I still haven't learned how to photograph myself (and probably never will) and besides me there is only one person here who agrees to do it, albeit reluctantly. This person has been busy with other stuff most of the time and my jacket was left unphotographed (like most of my other projects, alas).

And then the war started.

During the last five years we went through several natural disasters (I am not even touching politics now). We survived a category 4 hurricane, a pandemic with lockdowns, new rules, and disappearance of toilet paper. 

And now the war. February 24 was a terrible day in our family life. No, I don't have any relatives or friends in Ukraine. Even in Russia there are not many people who still remember me. After all, for the last 27 years we've been living in the US, our children grew up here, we stopped checking news from Russia many years ago. Yet, still it hit us like a ton of bricks. 

For a while I couldn't do anything but check the news feed every 5 minutes.  I - the person who keeps telling everyone "Stop reading the news" - couldn't concentrate on anything else. At some point I noticed that my whole body wouldn't stop shaking and knew that something drastic should have been done to change the situation.

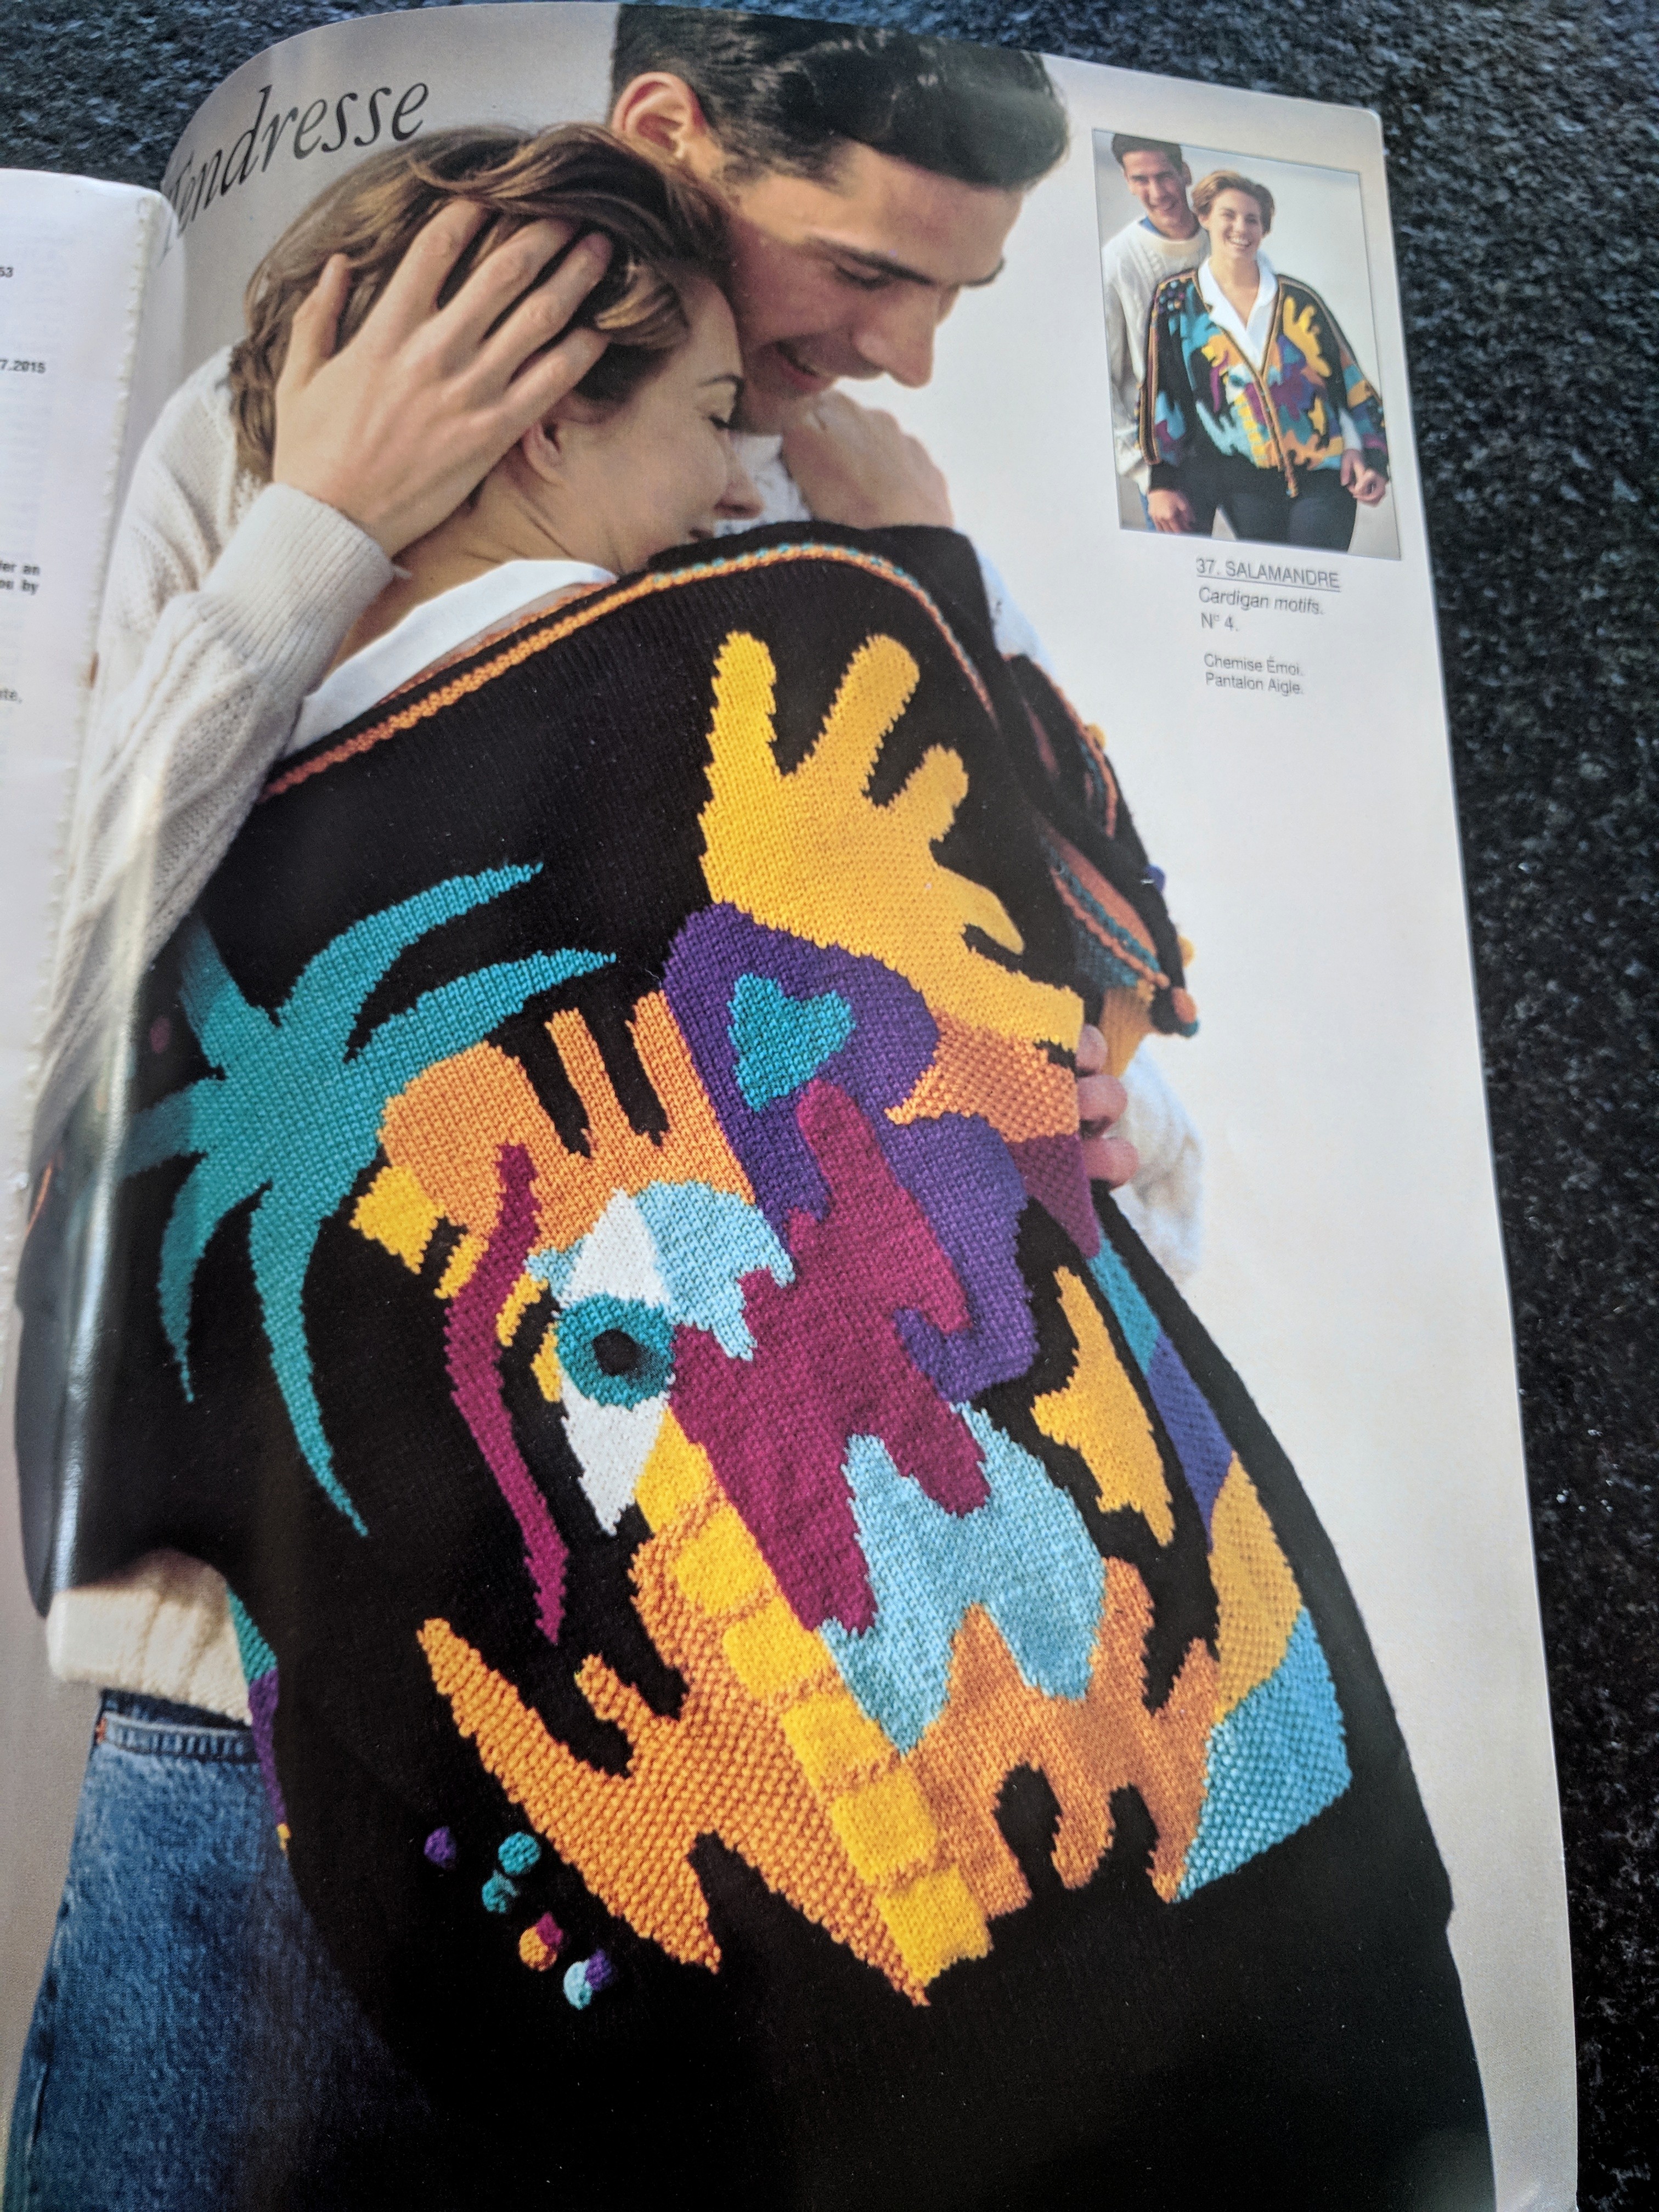
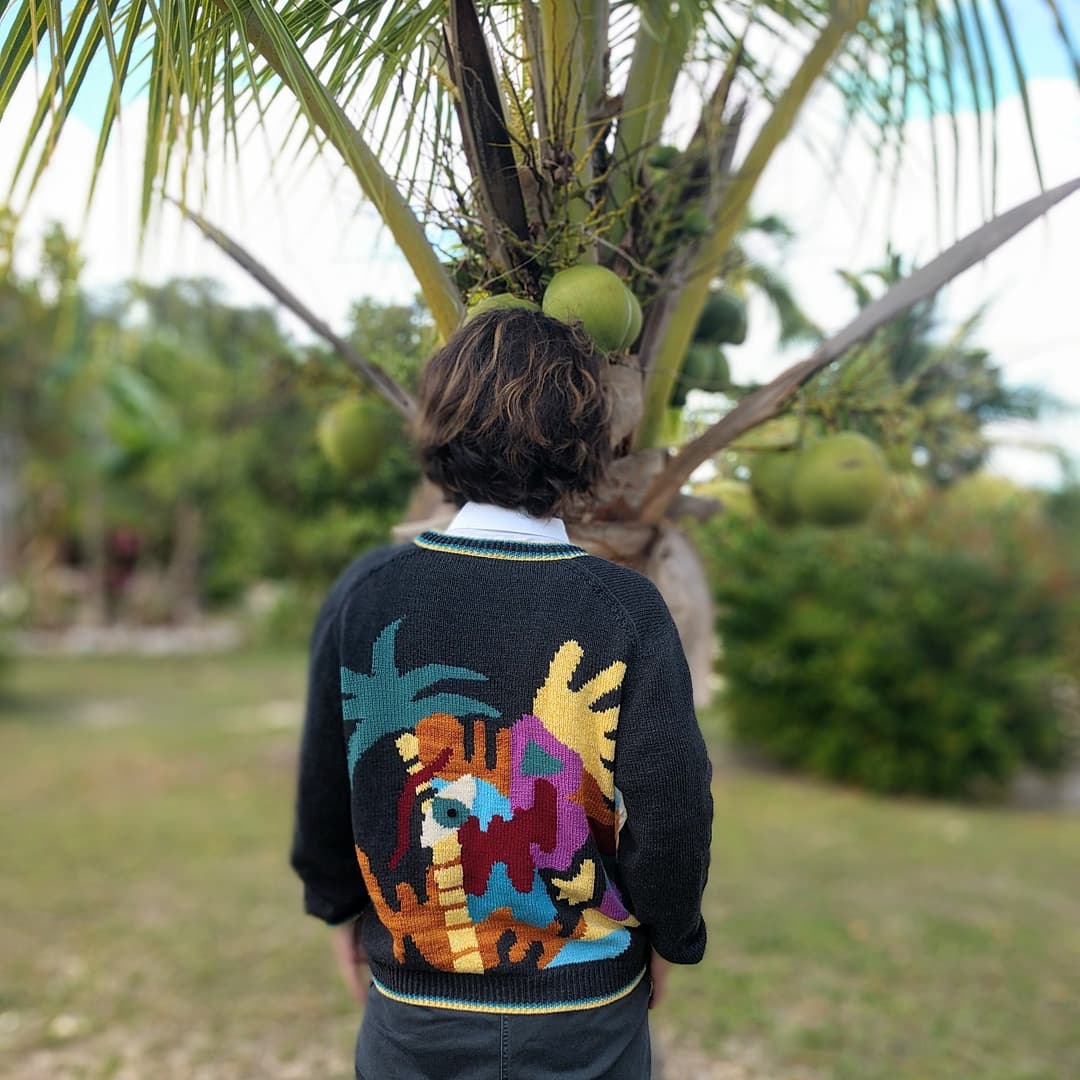
I remembered a jacket with a palm tree and a parrot (sort of) that I saw in an Anny Blatt magazine.

I promptly collected as many matching colors as I could find. Most of them were tiny balls of ColourMart cashmere scraps. My yarns had different thickness and couldn't be used together. So I spent quite a lot of time mixing, reballing, and rewinding them to get approximately (the operative word here!) same gauge in all of them. By the way, I made several changes while in the middle of making the back when it became obvious that some colors didn't look right or some yarns were too thin or too thick for the main fabric.

This project was extremely absorbing. It required all my focus and dedication and definitely helped restore my self-control. 

The magazine's variation of the jacket has lot of "bells and whistles": different intarsia versions for back, fronts, and sleeves; sleeves have stripes in the middle; crocheted stripes go along the sleeves and back shoulders; there are multicolored bubbles; intarsia is not uniform stockinette, some of it is done in moss stitch. Plus the whole pattern is rather short and boxy, not to my liking.

After I finished with colors and yarns, I went looking for a jacket pattern that would fit me better and found one in an old (surprise!) Phildar magazine appropriately called New Classic.

True to its title it contains simple but classic patterns for the whole family. I picked a jacket with "fully fashioned shoulders" (aka "Japanese shoulders") that I described in detail here. This type of construction is really well fitting if done right and I like my stooped back in it better (if it is possible to like a stooped back).

My version of the jacket was supposed to have intarsia only on its back, everything else was supposed to be done in black with colorful borders, wrists, and button band frames. I was also hoping for pockets. 

Sleeves - the easiest part - were knit first. Then I started my journey with the back.

When the back was finished (surprisingly quickly), the balls of black yarn looked tiny and almost all other colors mostly disappeared. Ok, no pockets, but would I have enough black yarn for the fronts in one color? After long deliberations and lots of yarn weighting I didn't want to take a risk and started looking for other solutions. 

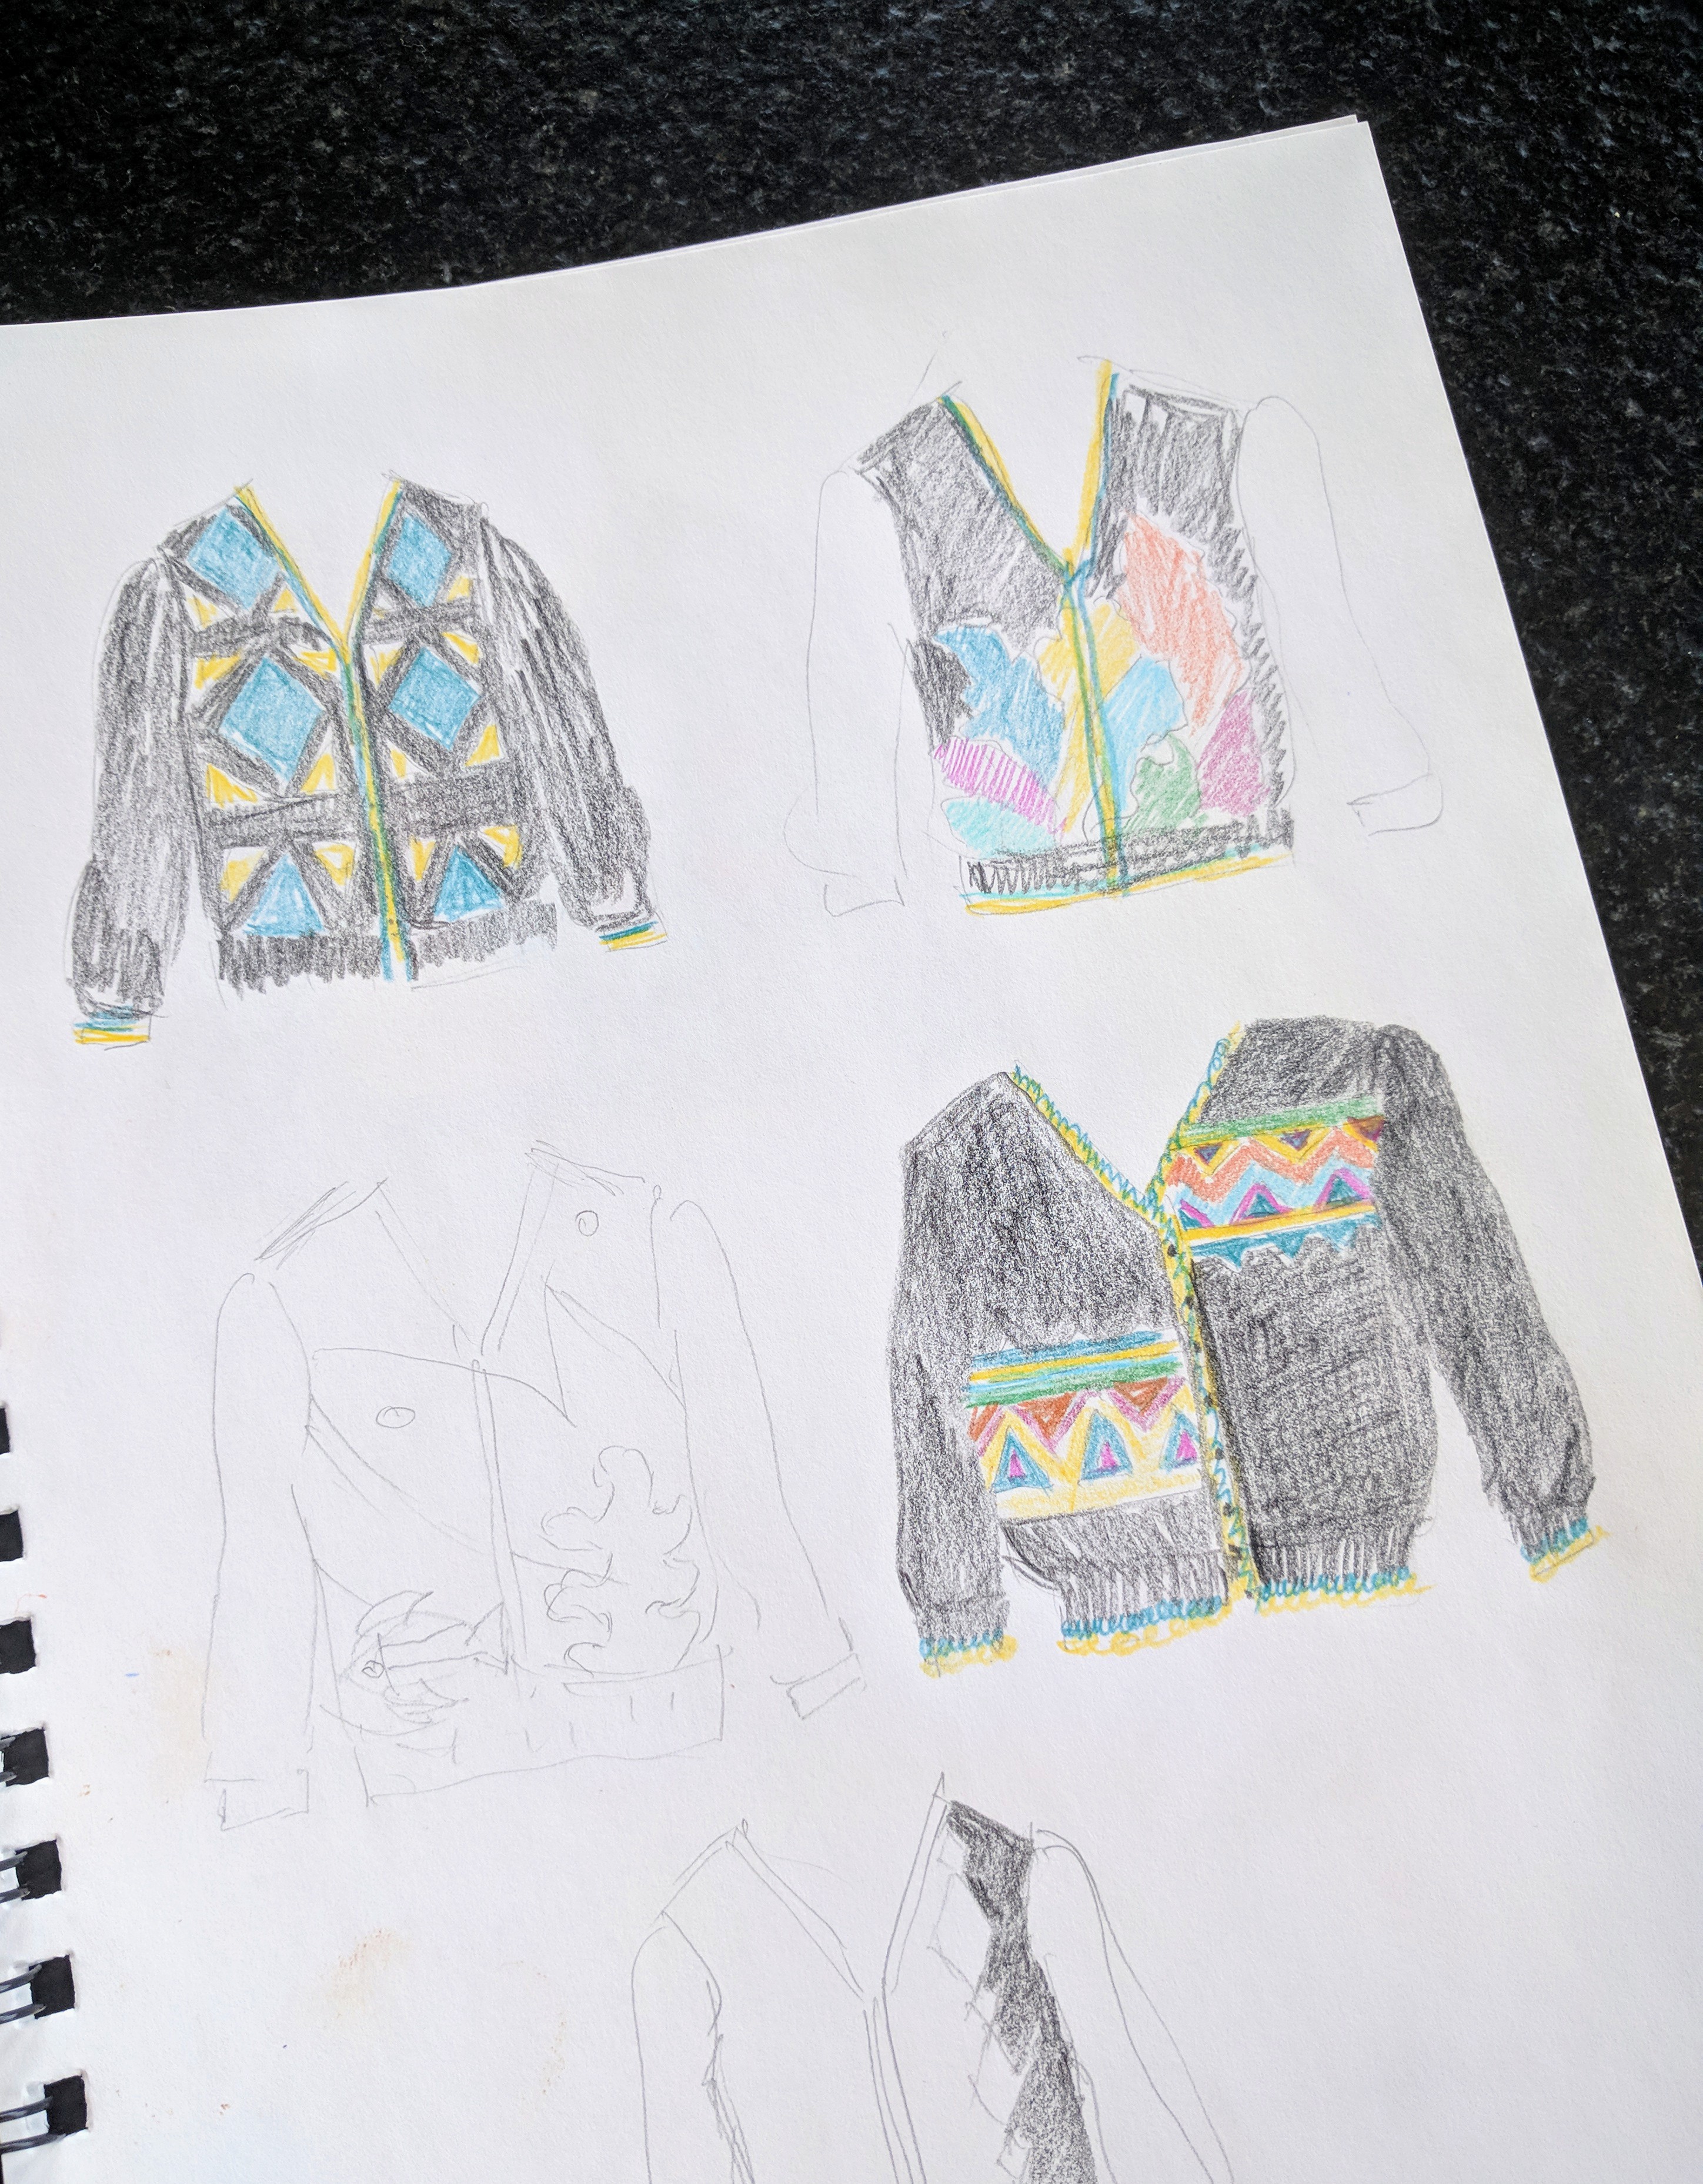
I made several sketches trying to visualize my future fronts in different color patterns.


The one with a big flower seemed to be more logical. I drew this pattern on a piece of graph paper (it wasn't easy at first, but it wasn't too hard either) and promptly started knitting. At this particular moment knitting was like a drug to me. More knitting - less thinking (and less worrying).
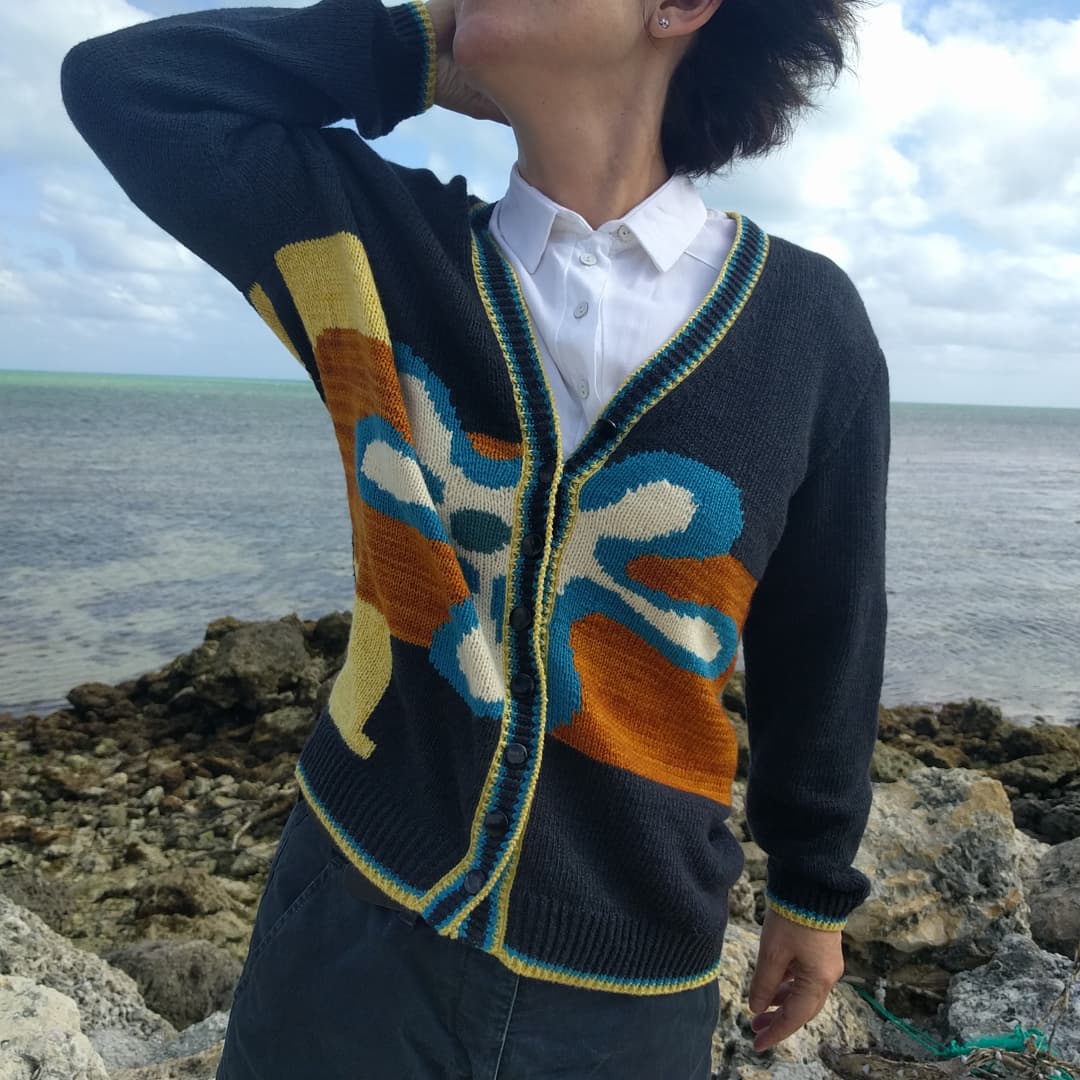
And that is, in a nutshell, the story of my Tropical cardigan. By the way, the original pattern from Anny Blatt is called Salamandre but I changed it so much it didn't feel right to use the same title.

There is one last thing that I haven't told you about this jacket and you cannot see it in the pictures. I put my Floridian address on it, knit it in the side of the right front which makes it almost invisible (unless I raise my right arm and turn sideways). It is a sort of inside joke that can be understood only by the people who live in the Florida Keys and are familiar with the local direction system.

I would have preferred my original plan - all black front with intarsia only on the back. I do think that two intarsias are different in style and partially in color. Yet, I still like this jacket because it taught me quite a few important lessons.
Lesson one: intarsia is the best therapy for anxiety. While living through a traumatic event, just pick up your needles and start knitting something extremely complicated. You'll feel better... eventually... 

Lesson two: you don't have to hide all the tails in one go. Actually, it works better if you pace yourself, going methodically section by section. I did it this way for each part before washing and blocking.

Lesson three: there is no need for many colors of the same exact yarn. Using a little bit different yarn actually adds some texture to the final look.

Lesson four: intarsia only looks scary. It is a lot of fun, but it requires total absorption and focus. 

While making the jacket I stumbled on this cardigan by R13.

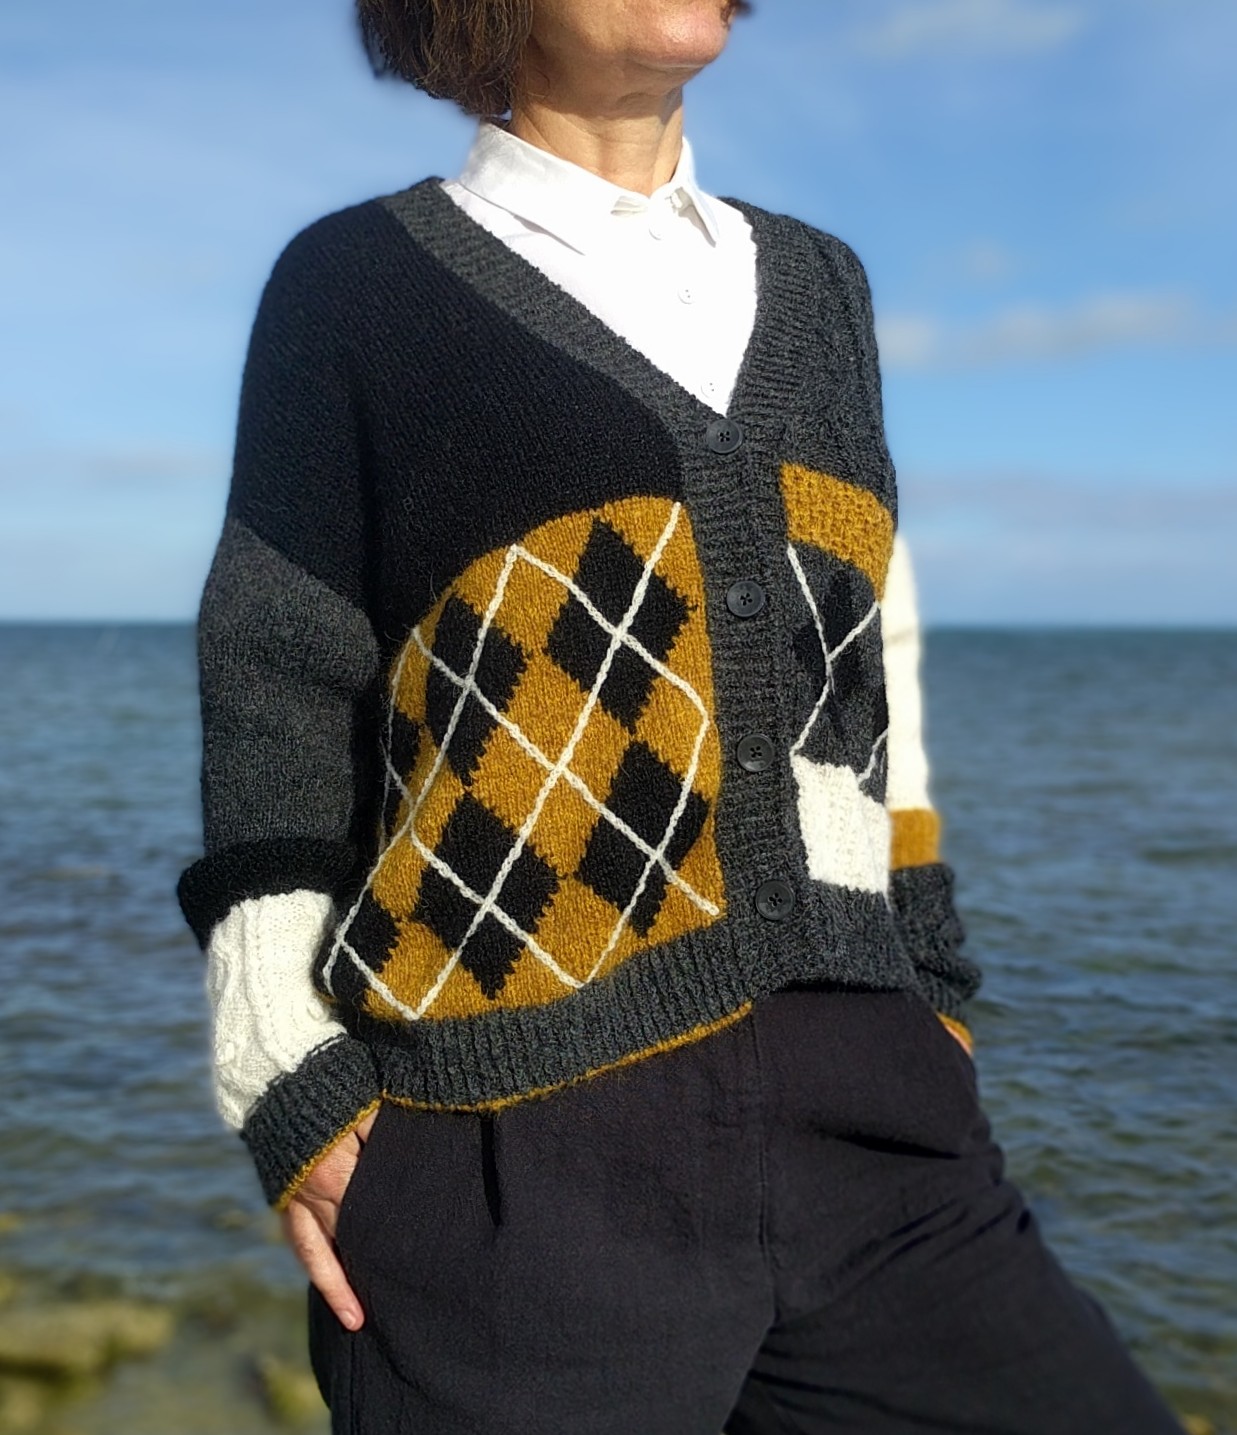
It has an intarsia pattern (check), a really well known intarsia pattern (check check) originated in Scotland (check check check). It is extremely expensive and made look older and worn out on purpose - two things that I don't like in knits. Instantly I had an idea to recreate this cardigan without distressing and with the yarns that I had. I think that unconsciously I was afraid of starting something simple and straightforward that wouldn't require all my attention. Plus I do like distressed jeans but truly hate distressed knits. Blame my poor childhood in the USSR. I don't find laddered  knits with holes and frayed edges attractive, rather the opposite. They look depressing and untidy to me. 

I remembered the wonderful walnutty brown Hawkshaw sheep yarn bought last year during Perth Festival of Yarn. Here is the link to the seller's website and her Instagram page. Next time I plan on buying more of this yarn in Perth.

It is finger weight but if doubled it could work for my R13 jacket knock off. I also brought from Scotland several balls of Rowan kidsilk mohair in black and white that could work as well but were thinner than needed for the project. I decided to mix them with Drops alpaca in black and white (leftover from the Keito Dama jacket). Together these yarns gave me the right thickness  and added the fluff of the original jacket that the Hawkshaw wool was lacking. 

All the preparations - sketch drawings, pattern calculations, gauges, yarn balling - were made while the parts of the Tropical jacket were blocked and drying. As soon as one jacket was finished I started working on another one. No pause whatsoever. 

Here you can compare and contrast my cardigan with the original.


What did I do differently? 

The shoulder construction. This time I didn't go for the "full-fashioned shoulder". And I think the original has exactly this type of shoulders if you look closely. Obviously, I didn't look closely - too much in a hurry.

My version doesn't have pockets - again!

The paradox of my existence is that I own so much yarn yet am constantly running out of yarn. Like everyone else, I am very much risk averse. When it looks like I won't have enough yarn to finish my knit, I start panicking. And making an intarsia project you deal with many balls that are smaller than the initial ones, plus in this case I was using the yarn doubled. After the back was finished my brown balls didn't look too promising, so I decided to get rid of the pockets. Now I can tell you that it was a wrong decision. I would have had enough yarn for pockets. Big sigh!

I made more buttonholes and my buttons are different. My cardigan is less fluffy and less oversized.

And I had to embroider the colored strips that criss-cross the losanges unlike in the original cardigan which is machine knit and the strips are done simultaneously with everything else.

Embroidering was the most difficult part while working on this cardigan. The actual knitting went pretty quickly. The pattern is geometric, regular, and easy to remember. I was using 3.5 mm needles, not 2 mm and 2.5 mm like in my Tropical jacket. And there were only 3 colors. 

I spent the whole day figuring out the embroidery technique that would work better for this piece. Normally for embroidery you would use yarn that has either the same thickness or even is thicker than the main yarn. My crocheted strips with alpaca/mohair mix looked terribly handmade and sloppy. Any other kind of embroidery looked the same since I wasn't really skillful in it, and no matter how much I practiced it would not get better. Eventually, I went back to crocheting, but used only Rowan kidsilk mohair for it, omitting Drops alpaca.

I had to crochet as loosely as possible to avoid tightening and gathering around the strips. It took a while (and many unravelings) to find the right tension. On the bright side (always look at the bright side...) this cardigan will keep its form and won't stretch no matter what - the thin crochet strips keep it in place nicely.
And this a short account of how I suddenly became obsessed with intarsia. Now I am working on another project from an old French magazine with intarsia and fair isle together. Who needs a therapist when you can just knit intarsia instead, right?